Showing posts with label greenhouse. Show all posts

Wednesday, May 16, 2012

Into the Trenches! How to Trench Plant Tomatoes.


You know the adage about the shoemaker's children? The same holds true for the gardens of nursery owners. Our first responsibility is to ensure our green babies thrive and find happy homes. Then, and only then, can we take a moment to put our own selected babies to bed.

Spring 2012 wrecked havoc on my plants...and my nerves. The seedlings grew beautifully in the new greenhouse—lush and full of promise. But then, our spring vanished in a blink, and we faced unseasonably warm temperatures. Those lovely little seedlings became behemoth, towering monsters...far too early. Yes, I—like most gardeners—was excited about the prospects of early tomatoes. But then, suddenly, the plants grew too large to ship. Or transport to market.

I sold what I could, gave away plants to friends, and searched for community and school gardens to donate the plants.

After hours and days and weeks and months of work...the majority ended up in the compost pile. 


Heartbreaking.

But—this is not a tale of woe. (Well, maybe it is a little bit of a pity party...but let's just shake that off, shall we?)

This is a tale of how you can take a too-tall tomato plant and turn it into a strong, healthy, fruit-producing machine!

I admit, this is the first year I've tried trench planting tomatoes. I've never needed to contend with ultra-tall plants before. However, I've always been a believer in planting tomatoes as deeply as possible to develop a strong root system. Trench planting embraces the same premise.


The tiny hairs along the stem of the tomato plant will develop into roots upon contact with soil. By planting more of the stem underground, you're providing more opportunities for root development. By growing more roots, the plant can absorb more water and nutrients to produce a greater crop. And—the additional roots provide a sturdy support, bracing the plant against strong winds and storms.

Trench planting is ridiculously simple.

Step 1:
Remove the plant from the container—unless it's grown in a biodegradable pot, like I use. If your plant sports a biodegradable pot, tear off the top lip of the pot to the soil line.


Step 2:
Dig a trench approximately 4 inches deep, and as long as your plant is tall.

Step 3:
Pinch off or snip any suckers along the stem, leaving at least four sets of leaves at the top of the plant. (Must have those leaves for photosynthesis, of course!)

Step 4:
Place your plant horizontally in the trench, gently bending the top portion of the plant upward. Be careful not to pull too hard, or you might snap the stem.

Step 5:
Cover the root ball and stem with soil, gently firming the soil around the plant. The top of your plant will lean a bit—but as the plant adjusts to its new home, it will straighten.


Step 6:
Stake your plant. Remember—you want to keep those leaves off the ground to prevent disease.

Step 7:
Water well.

Now, wasn't that easy?

A few tips when planting tomatoes:

I always add lime into the soil to provide a boost of calcium to the plant. Calcium helps prevent blossom end rot—that nasty black spot on the bottom of tomatoes. It's best to add lime into the soil a few months ahead of planting...but honestly, I add it at planting time, and it's never failed me. (Crossing fingers.)

Also—remember to water consistently. My rule is: stick your index finger into the soil, approximately one inch deep. If it's moist—don't water. If it's dry, time to water! Inconsistent watering also leads to disease and poor tasting fruit, so make certain to keep those babies hydrated.

While we're on the topic of water—avoid wetting the leaves, which also can cause disease. Drip irrigation is best—it allows the water to get straight to the roots.

And—don't forget to feed your babies. If you prepared your beds with good, organic components—you don't need to fertilize at planting. However, tomatoes are heavy feeders. I use fish emulsion or a good, organic fertilizer high in phosphorus as fruit sets, and then I feed them again about every two weeks throughout the season.

Take a look at the N-P-K ratio, the numbers you see on commercial fertilizers:
N = Nitrogen, which promotes tissue development and big, green, leafy growth. Too much nitrogen, and you'll have a lovely plant—with no fruit.
P = Phosphorus stimulates root growth and helps the plant set buds and flowers. This is key in developing delicious tomatoes!
K = Potassium improves overall vigor of the plant. It helps the plant make carbohydrates and provides disease resistance.

The key to selecting an organic fertilizer is to choose one with a higher “P,” such as 5-10-5.

So, my gardening friends, your tomatoes will have strong roots, adequate calcium and water, and enough good nutrients to produce delicious summer harvests for your dinner!

I'm growing 60 varieties of tomatoes in our gardens of the 160 varieties I grew for the business. (I just need more sunny beds so I can grow them all!)

What varieties do you plan to grow this year? And what's the most delicious variety you've ever eaten? I'd love to know...(I'm craving bruschetta right now...for breakfast! Hurry up and grow, tomatoes!)

Happy gardening!

XO ~

Julie

Monday, January 23, 2012

Winter Babies, Spring Babies.

It's Monday. It's bleak. Dreary. Cold, wet, and nasty. My girlie is home with a tummy-ache, a headache, and various other undefined aches. My plans for work are scattered and shuffled. Downstairs, boxes and boxes of seeds await planting. The Garden Delights website needs updating. The house needs scouring. To top it off, there are no. snacks. in. this. house.

Honestly, a chocolate chip cookie would cure my lethargy. I'm certain of it.

Instead of a sugar boost, I sloshed down to the big greenhouse to check on the few trays of seeds I planted Friday.

 
Unlike my friend Jessie, who has been anxiously awaiting the arrival of Baby “J” now for 41 weeks (and she looks magnificent, by the way, which is really irritating because I was never a cute pregnant woman, let alone adorable at 41 weeks of baby-ness)...


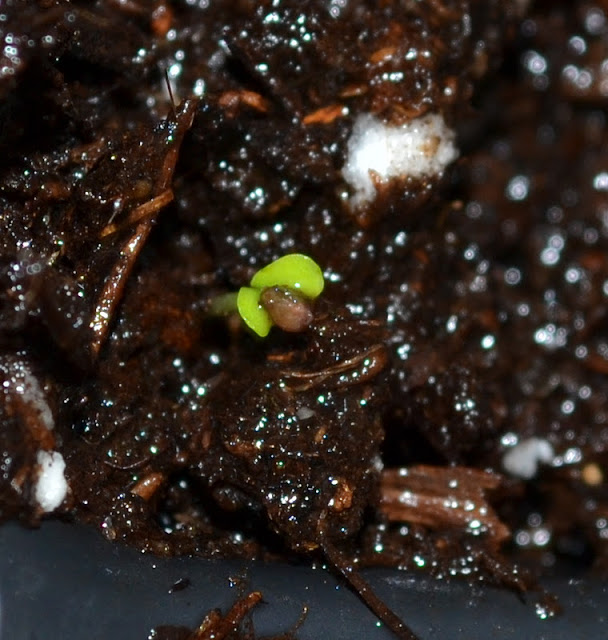
...my babies are already making an appearance!


That tiny bit of green gives me hope that perhaps spring will arrive...someday.


As an added perk, the first daffodil of the season popped...bliss! If I lean way back in my chair and turn my head a bit to the left, I can waste some more time gazing at its cheerfulness.

Alas, it's time to get busy. My husband has accused me of treating my business like a hobby, and as much as it kills me—today, I agree. So, it's time to update the site and add all of the new offerings, give some crackers to my girl, and finish planting the herbs and heirloom flower seeds.

Because tomorrow, it's time for tomatoes...lots and lots of tomatoes.

I hope your Monday is far more productive than mine.

XO ~

Julie

P.S. Heaven! I found a lone, unclaimed Lindt chocolate truffle. Ahhhh....

Tuesday, November 22, 2011

Making Magic.

Last week, I picked up a novel called The Magicians by Lev Grossman, thinking that this might be a fun read for our girlie. As I found it in the teen section, however, I decided to read it first. (Confession: I love kids books, teen books, ANY books.) 

Whew. Thank goodness I checked it out! Within the first two pages, the author introduced topics including virginity (or lack thereof), masturbation, as well as some... flavorful... language.

Now, I'm not a book burner. In fact, nothing incites me more than extremist groups who try to ban Harry Potter from school libraries. But, I do worry about age appropriateness, particularly when a 10-year-old reads books with teen protagonists.

Yep. Not passing along this book to my daughter just yet.

Don't get me wrong—it's a good read so far. It's just too mature for my Kiki. Although she loves books with magic and fantasy, this one has a bit too much harsh reality that I don't want her to experience ever too soon.

Still, there is something magical about pushing the limits. As a child, I definitely read books that were too advanced for my age. And boy, do I remember the trouble we got in for passing around my friend Diane's dog-eared copy of Forever. I wasn't typically a rule breaker, but on the few occasions that I did—it was, well, thrilling.

And empowering.

Maybe even a little magical.

Breaking the rules and pushing limits is still a bit of a rush—but now, my rebelliousness lives in the garden.

(Wow, writing that aged me about 20 years, didn't it?)

I admit—I am very behind on my gardening chores this fall. In fact, I just planted our fall vegetable garden—two weeks ago. Even by South Carolina, zone 7b standards...that's late. It's almost futile.

Unless you push the limits and disobey certain rules.

Recently, I've become enamored with the concept of season extension. What can I do, with our little piece of earth, to feed my family throughout the winter? How can I keep my fall garden producing? Can I fight the elements and extend the harvest, even if the “experts” disagree? Will my garlic crop fail if I don't get it planted by Halloween? Will my lettuce wither and melt if I plant it in late October instead of mid-September? Or can I thumb my nose at conventional gardening wisdom and produce a bumper crop of brassicas to harvest in January?

The key, I think, is to break some of the rules...but still adhere to some of the tried and true methods for season extension.

There's a really terrific program with which I'm lucky enough to be associated: Greenville Organic FoodsOrganization's (GOFO) Grow Healthy Kids. Through GOFO, schools in a local district can participate in growing an edible garden, complete with lessons that match the ever important state curriculum standards. The students receive transplants and seeds, as well as organic fertilizer and supplies, from GOFO. However, the key to the success of the gardens is the highly technical row covers GOFO provides, which allows the schools to protect their crops during cold periods, so that the kids can continue to harvest crops throughout the semester.

Plastic covering + bent metal masonry ladders = mini greenhouses.

The schools can participate in both the spring and fall, with the focus on cool weather crops, since those are the veggies most easily grown during the school year in Upstate South Carolina. The low tunnels are easy to install, and the supports can remain in place throughout the growing season. When a freeze watch is issued, the teacher or students can simply place the plastic over the supports, securing the covering to the ground with rocks or bricks to keep it in place. The plastic protects the plants from damaging frost and insulates the plants from severe temperatures. On average, the temperature in the low tunnel is approximately 10 degrees warmer than the outside air. In our zone, those 10 degrees can mean the difference between an ongoing harvest—and complete crop loss.

Because I'm the Master Gardener liaison for the Grow Healthy Kids program, I decided it's time to practice what I preach.

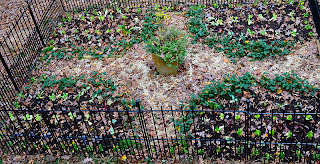
Typically, I plant our fall garden in the potager—my experiment in an attempt to design a formal, attractive kitchen garden. Honestly, our other gardens are—to put it nicely—wild. Unkempt. In serious need of hours of weeding and prettifying. The potager is my one place that I try to keep balanced and organized. 


It's also the perfect experiment for bending the rules with season extension.

Because the potager resides in the midst of our backyard, and because our two sweet pups are fabulous destroyers of all things green, my darling husband installed a fence around the potager when we designed it.

My supports are already in place!

With no need to buy additional hardware to make low tunnel supports, I headed to the big orange box store to purchase the plastic cover. I spent a little bit more for a thicker covering. Wow--who knew how many assorted plastic drop cloths are available? For $25, I found a 4 mm, 20' x 50' plastic sheet to serve as the insulation of the low tunnel.

Honestly, the trickiest part of installing my winter covering was unrolling the plastic—if you have a friend handy, recruit the extra pair of hands. Still, in less than 15 minutes, the potager was covered, the plastic was secured to the ground on each side of the fence with several rocks, and the cool weather crops were insulated against the nighttime low of 30 degrees. 


Now, that's cold for South Carolina!

While the plastic protects against the freezing temperatures, it can also damage the garden if the temperature spikes. Immediately following our few days of freezing nights, we're back in the 70s this week. 

The beauty of the low tunnel system is its simplicity—when it's warm, roll the cover off the frame and leave it on the ground (or, in my case, on one side of the fence...)


and when the temperature drops—pull the cover back over the frame.

Presto! Fresh veggies into the winter!

It's like magic! (I hope.)

So, because I planted the fall garden so recently, I haven't harvested anything from it yet. Soon, I hope we'll have lettuce (eight heirloom varieties), spinach, chard, broccoli, pac choi, red cabbage, and cauliflower. 


But, because of the “Produce Post” hosted by smallkitchengarden.net, I thought I'd share a few things we're enjoying this week from the garden:


The fraise des bois keep surprising me. Even after several frosts, they are still producing fruit—and more flowers! Love, love these tiny delicious garden gems.

Last night, along with the quiche made from the eggs provided by our backyard chickens and enhanced with chives from the garden...


...we ate one of the last tomatoes of the season...picked green and ripened in a paper bag with a banana. Ripening green tomatoes was a huge success—our freezer is now filled with bags of tomatoes to use this winter, all picked while still green.

Our nine varieties of garlic harvested this summer continue to be a staple ingredient in almost every dish we cook. How can anyone not like garlic—especially homegrown garlic?

Probably the single most prevalent item I'll be using from the garden this week will be herbs...lots and lots of sage, parsley, rosemary, and thyme for Thanksgiving dinner. Our local, organic turkey will be dressed with many herbs. I'm still harvesting:

 Provence lavender


Italian Flat Leaf Parsley


 Pineapple Mint

 Peppermint

 Tri-Color Sage

Curly Parsley

Chives

 Greek Oregano

 Lemon Thyme

 Rosemary, possibly my favorite of all herbs.

So, while we won't be eating from the potager just yet, we might be harvesting heirloom lettuce to serve at Christmas dinner.

Homegrown lettuce in December? It's kind of...magical, don't you think?

Happy gardening!

XO ~

Julie