Showing posts with label compost. Show all posts

Tuesday, July 24, 2012

Jack-O'-Lantern in July.

If you find a perfect pumpkin in the compost bin, you know you have to make it into a jack-o'-lantern, even if it is July.


Of course, getting two children to agree on a theme for one pumpkin is rather tricky. Thus, our summer-themed jack-o'-lantern includes a sun, a moon, and a palm tree. 

As an extremely tired mother, I let go of my normal compulsion to talk them into something cuter. It was, after all, 10 p.m. by the time they finished swimming and came in to carve the pumpkin. (Personally, I thought a beach umbrella and waves would be festive.)

Our jack-o'-lantern adorned the stoop last night, glowing brightly while we listened to an owl hooting in the forest. It felt eerily like Halloween. 

But then, with today's mid-90 degree temperatures, our poor pumpkin began to melt. So, tonight our jack-o'-lantern became a snack for happy chickens.

Have you ever found anything interesting growing in your compost bin? I'm hoping we find another pumpkin...a little later in the season.

Happy July-oween!

 ~ Julie 

Monday, May 14, 2012

Making Beds. (Vegetable Garden Beds, That Is.)


It's raining, it's pouring...down-pouring, actually. Hooray for the rain! Not only do our poor, empty South Carolina lakes need a refill, but I'm seriously behind in writing.

Lately, any free moment of daylight is spent in the garden, working frantically to prepare for the Carolina Farm Stewardship Association's Upstate Farm Tour. While I'm excited and honored to be included on the tour—particularly since we are not a traditional farm—I'm also nervous! I mean, honestly—who wants to tour an empty backyard?

So, my friends, that's where I've been lately, building and digging and planting and prettifying.

The garden tasks haven't left much time for writing—or washing laundry. (And gardening is just so much tastier than cleaning toilets.)

Fortunately, I'm making progress. When I last updated about the six new raised beds for the large vegetable garden, we chatted about creating soil to fill the beds. Remember my perfect calculations to determine how much peat moss, vermiculite, and mushroom compost I would need to fill the beds?

Well. Multiply that originally calculated 120 cubic feet...by 2.

Guess who made a teeny, tiny boo-boo in her math?

Yes. Yes, I did.

Now, in my defense, my math was correct. My ability to measure is what threw off the calculations.

Remember how I mentioned that the original garden slopes?


In designing the raised beds, Peter compensated for the sloping ground by building the beds to accommodate the slope—allowing the beds to appear straight, which resulted in a tiered garden.


Can you see in the photo above how the board on the right side of each bed isn't as tall as the board on the left side of the bed? In fact, the board on the right side is six inches high—which is what I used to calculate the height of the bed. In reality, the bed is 12 inches deep. The left board is 12 inches high, and the right side is dug out to make the height also 12 inches.

Thus, my miscalculation.

My formula for each bed should have been:

Length (10 feet) x Width (4 feet) x Height (1 foot, NOT .5 feet) = 40 cubic feet per bed, NOT 20 cubic feet...which is what I calculated.

Yeesh.

I apologize.

If you are building raised beds...I wish you a perfectly flat plot for your construction project.

Anyway...

Let's talk about making soil.

After all of the trauma and drama of getting another load of peat moss, compost, and vermiculite, we were ready to fill the beds.

It's important to mix all of the components well. Remember our 1/3 ratios? You want 1/3 peat, 1/3 compost, and 1/3 vermiculite to comprise the soil in each bed.

First, because it's so light, we added the peat directly into the bed.

Next, we poured the vermiculite on top of the peat...


...and thoroughly mixed the two with a rake. 


Then, we added the mushroom compost. And mixed. And mixed some more.


To ensure even distribution, we made half the soil for the bed, then started the process again—adding more peat and vermiculite on top of the already mixed ingredients, then raking in the mushroom compost—and finally mixing and smoothing the entire bed.

Peat. Vermiculite. Compost. Mix. Repeat.

And repeat.

And repeat.

Finally, with very tired arms and backs, the beds were ready.


In three of the beds designated for tomatoes and peppers, though, I added lime to the mix.
Lime adds calcium to the soil. Have you ever noticed a nasty brown/black spot on the bottom of your tomatoes? Blossom end rot is caused by a calcium deficiency in the plant. Lime helps keep your tomatoes looking lovely.

The Plan.
One of my goals for our garden is to provide diverse, interesting, delicious produce for our family. In fact, I'm challenging myself to grow ALL of our produce this summer. But that's a story for another day.

To meet that goal, though, I needed to plan strategically what to grow, how to space it, and how to prevent pests and diseases from decimating the crops. Additionally, all of the produce in the garden is grown from non-GMO, heirloom seeds...no super-powered Franken-plants to thwart diseases in my garden. Careful planning and maintenance are my superpowers of choice to keep the garden healthy.

Typically, I plant in standard rows. Rows and rows of heirloom tomatoes and peppers, throwing in a few beans and squash.

Now, with our new raised beds, I decided to implement a combination of companion planting and square foot gardening to maximize the output for each bed.

Honestly, this project wasn't cheap, particularly when someone miscalculates the amount of soil needed.

We need some serious return on investment here in the form of deliciousness.

Square Foot Gardening is an intensive planting technique that divides a bed into a grid of 12” boxes. Each square foot is planted according to the harvest size of the produce. For instance, one tomato plant can occupy a 12” square, while four Swiss Chard or 16 radishes would fit in that same space.
The founder of Square Foot Gardening would argue that I'm not truly following his methodology. Rather than installing a rigid, permanent grid on top of the beds, I used a trellis I had on hand as a guide for planting. By laying it across the top of the bed, I formed the needed grid pattern that indicated 12” x 12” squares—and then I planted accordingly.

Four corn seeds (plants) per square foot: 
Along with the modified square foot gardening method, I decided to research which plants work well together. Companion planting is simply an interplanting technique—discovering which plants assist each other in growing well, which plants repel pests or attract beneficial insects, and even which plants repel one another.

Armed with my handy resource, Carrots Love Tomatoes, I made a list of the vegetables I planned to plant. Then, I researched the plants that would coexist well together and repel various pests, as well as the plants to avoid as bedfellows.

We've all heard about the Three Sisters Garden: corn, beans, and squash all are perfect companions. Beans provide nitrogen in the soil for the corn, corn supports the beans as a trellis, and squash serves as a mulch to keep the soil cool and weed free.

However, I learned so much more when I delved into various companions. Last year, like so many of my friends, my squash bit the dust due to squash vine borers. As I researched companions for the garden, I found that icicle radishes, planted in a squash hill and allowed to flower, help prevent squash vine borer.

 Squash and Icicle Radish Companions.
Who knew?

So, rather than quickly plant my garden haphazardly, as I have done so often in the past, I made a plan.

A real plan. For each bed.

The first part of the plan involved foresight. Because of the problems we've had in the past with soil borne disease, I created the garden plan looking forward to next summer—and planning crop rotation.

My natural inclination is to plant every bed full of heirloom tomatoes. After all, I grew 160 varieties this year. How can you not want to plant one of each?

Instead, though, I reined in my tomato lust and contained the tomatoes to three beds—with the plan to rotate each year.

Must. Prevent. Diseases.

It's my new mantra.

As I thought about what we like to eat and what I like to grow, I sketched out THE PLAN.
THE PLAN:
And then, I couldn't read my writing.

So, I tried to decipher my writing, breaking out the big picture into a sketch for each bed. And as I planted each bed, I attempted to record any changes I made along the way (like squeezing in an extra Cherokee Purple tomato here and there. You can never have too many Cherokee Purples.)

Now, for your viewing pleasure, I give you:

THE RAISED BEDS.

(In front of the beds is an existing perennial herb garden, plus more annual herbs that I just planted yesterday. I'll show you the herbs next time, because right now, they're naked and in need of mulch. It's not a pretty site. And I think this blog post is turning into a novel instead of a blog. Thanks for hanging in there!)

Left Back:
The Plan: Beans, Three Sisters Garden: corn, beans, squash; zucchini, Edisto melon


The Planting
 

Left Front:
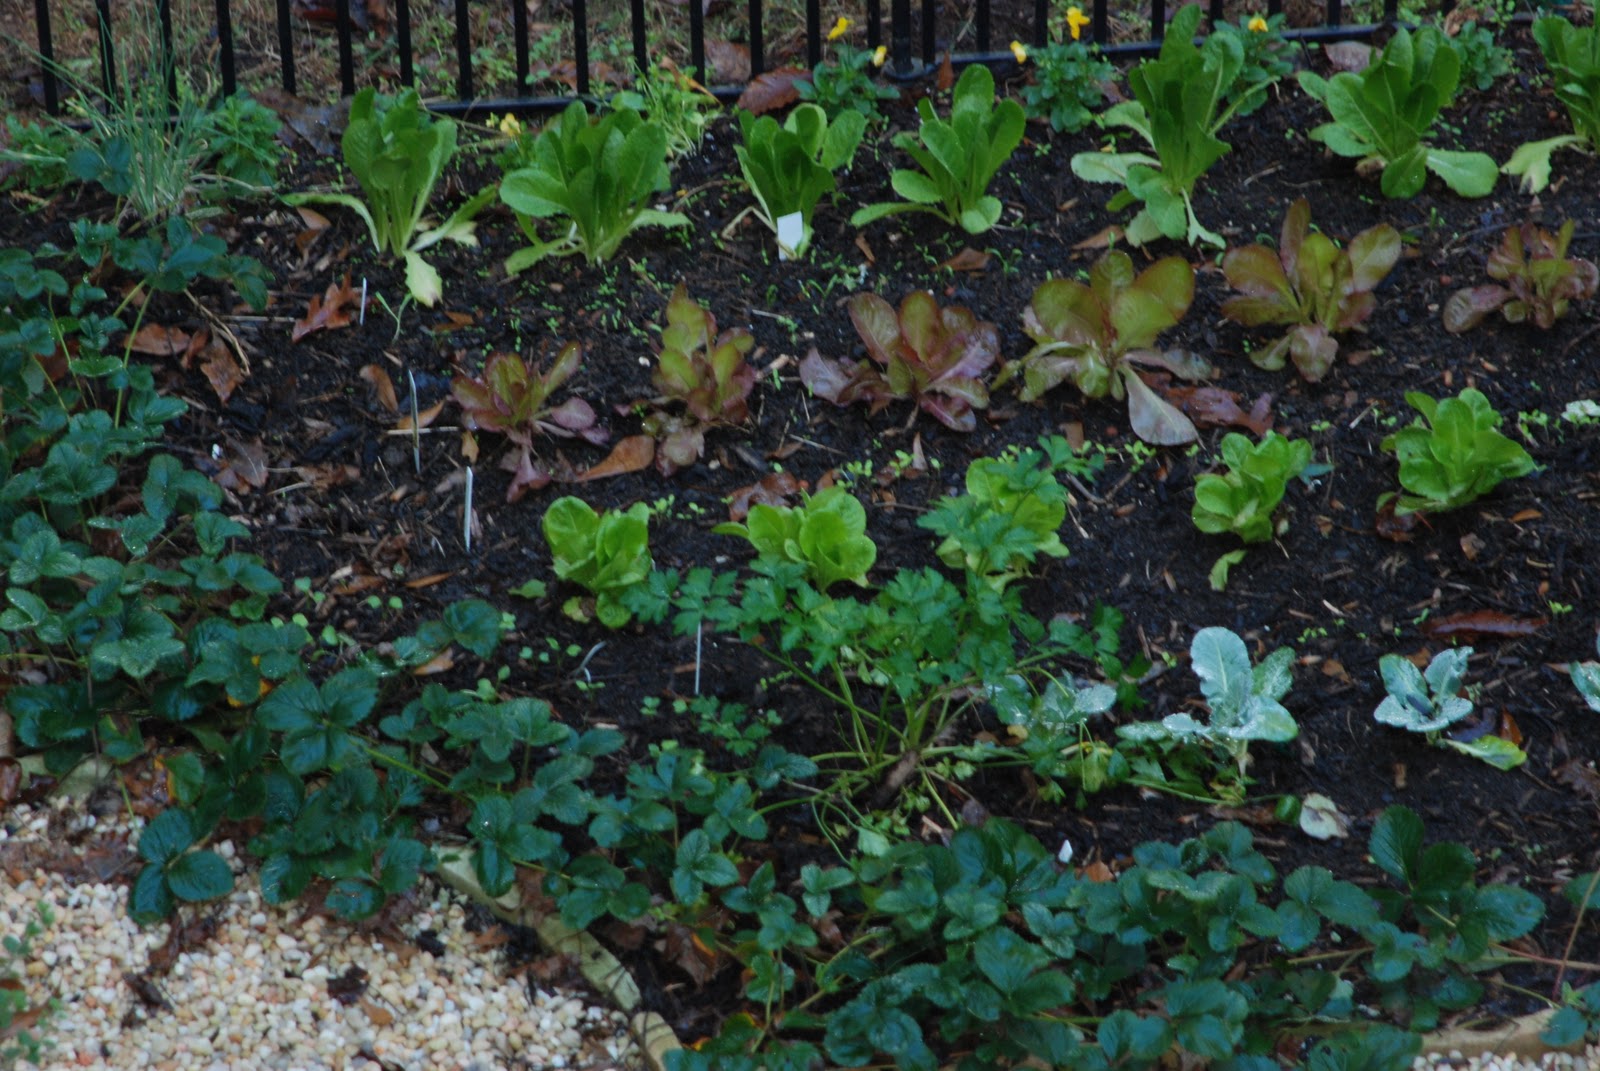
The Plan: Cucumbers, three varieties; Moon & Stars watermelon, heirloom lettuce, five varieties. (Note: normally, you wouldn't plant lettuce this time of year in the south. However, our garden also gets a bit of shade, so I can usually squeeze in a late crop without it bolting.)

The Planting
Middle Back:
The Plan: beans, 2 varieties; potatoes, five varieties; Swiss Chard; arugula; spinach, 2 varieties; carrots, 2 varieties; leeks.

The Planting

Middle Front:
The Plan: Tomatoes, sweet peppers, Genovese basil

The Planting

Right Back:
The Plan: Tomatoes, Swiss Chard, nasturtium
 
The Planting

Right Front:
The Plan: Tomatoes, hot peppers, globe basil, Genovese basil

The Planting
So, there you have it, my friends. Six beds filled with potential garden delicacies.

I can taste the bruschetta already.

For now, I'll give you a break to rest from this epic adventure. Later this week, I'll show you a couple smart strategies to incorporate as you plant your garden. (Think sturdy tomatoes, heavenly herbs, delicious potatoes, and pest-free produce!) Stay tuned...

The sky is clear...and I'm afraid it's back to the garden I go. There's still mulch to spread and flowers to add.

(And a search for any extra spaces to add another tomato.)

Happy gardening to you!

XO ~

Julie

Thursday, April 26, 2012

The Art of Raising Beds in the Veggie Garden.


Have you noticed that we always have a project or two happening at our home?

Our projects begin like this:

Me: “Wow, Peter, look at this great photo of this lady's raised bed vegetable garden.”

Peter: “Hmmm....”

Me: “You know, we had a lot of problems with disease last year. I think we really need to consider raised beds, because I'm sure our soil is diseased.”

Peter: “Mmmm...”

Me: (Pulling out the Gardener's Supply catalog). “Wow, take a look at these raised beds. They're cedar, so they won't decompose, and they're completely easy to install!”

Peter: (audible sigh, then choking noises when he sees the price tag for the raised beds.) “I'm sure we can build something...”

Thus began the most recent of our projects: six, 4-foot by 10-foot raised beds.

I'm honest enough to admit that I want instant gratification from our projects. Once I decide on something (like a raised bed garden), I want to install it that day so I can start planting.

Peter, however, is a bit more...practical. And precise.

I think I've mentioned once or ten times that he's Swiss. Well, you know those Swiss. Those lovely people who gave us the finest chocolate and the world's most precise time keeping instruments are not going to rush head-first into a project.

Oh, no.

Instead, very methodically, Peter reminds me that our garden slopes.

I don't remember this. He's just stalling.


I look. Wow, when did that slope get here?

Ah well, we'll just put the beds down and deal with the slope.

Patiently, he explains that the beds won't lay flat. We need to create beds that are adjusted to the slope and that can anchor into the soil.

This is becoming complicated.

While Peter measures and plans and Swiss engineers his design for the raised beds, I gaze longingly at my ideal, too expensive and impractical-for-a-sloping plot Gardener's Supply cedar beds.

Me: (Audible sigh.)

As is par for the course with all of our endeavors, my idealized quick weekend project turns into a month-long, all consuming PROJECT.

This is how it works at our house: I come up with Great Ideas, and Peter somehow makes these ideas a reality.

I just need to work on my patience.

And, I must say, all of the measuring and sawing and Swiss perfectionism is always, always worth the wait.


TA-DA! Our new raised beds!

Our sloping garden is now tiered—we still need another delivery of top soil to fill in the gaps, and then we'll mulch between rows.

But today, I'm making soil.

There's a lovely formula for making soil for raised beds. First, though, we need to calculate the volume for each raised bed. Remember back to your junior high geometry class? Length x width x height? We're determining how many cubic feet each raised bed will hold.

As an example, our raised beds are 10 feet (length) x 4 feet (width) x 6 inches (height). My formula will look like this:

10 x 4 x .5 (half a foot or six inches) = 20 cubic feet.

The raised bed will hold 20 cubic feet of soil.

But wait—I have SIX raised beds.

20 x 6 = 120 cubic feet.

That's a lot of soil.

Particularly when you own a Prius, not a truck.

Once you calculate the volume for your beds, it's time for more math.

I'm sorry.

When building raised beds, there's an excellent formula to use to ensure you're making good, rich soil for your plants. If you follow Square Foot Gardening, the author claims it as his own mix--and has even named it for himself.

Interesting. I learned the formula in Master Gardener class years ago, and no one tried to claim a copyright.

The mix is a rule of “thirds”: 

 
1/3 peat moss


1/3 vermiculite

 
1/3 compost.

Peat moss is typically used to provide a light, airy texture to heavy soils. Compost provides nutrients and microorganisms for your plants' health, and vermiculite helps to retain moisture.

Using several forms of compost provides diverse nutrients to the soil. I'm using our homemade compost, comprised of decomposed kitchen scraps, leaves, chicken manure, and grass clippings, as well as purchased mushroom compost. (And I may try to load up the Prius with well-rotted horse manure from Bramblewood Stables, where the kids ride. But we'll see. I may not be brave enough to have it in the new car, even if it's in a covered container.)

So, by rules of “thirds,” I calculated what I needed:

40 cubic feet of peat moss
40 cubic feet of compost
40 cubic feet of vermiculite

Armed with my list, I went to my favorite feed and seed store and stocked up.

Did I mention that I drive a Prius?

As soon as I made the purchase, I drove straight to one of the big box stores to rent a truck to haul my loot home.

Hooray! The truck was waiting in the lot!

Despair! Someone just rented it.

Have I mentioned that I've never driven a truck?

Oddly, I was strangely excited to drive the truck. Perhaps it was the empowering notion that I could follow through on one of my wacky plans without Peter needing to intervene and save me.

The rental person assured me that the truck would be back in 1-1/2 hours. This was at 9 a.m.

By noon, I panicked. Still no truck.

Thank goodness for friends who know of my crazy plans. And thank goodness for my friend Brandy, who volunteered her husband and son to pick up and deliver my stash.

And, honestly—thank goodness that I didn't have to unload the truck!

Seriously. There are good people in this world.

Now, though, my task today is to move this pile to the back garden.

And fill those lovely, Swiss engineered raised beds.

By tonight, after a day of hauling and mixing soil, I'm certain I will be able to fit into my skinny jeans.

(Oh wait. I think I gave them away.)

Wish me luck! I'm determined to get the soil ready so we can PLANT.

It's time to play in the garden!

Do you garden in raised beds? In containers? In the good ol' Earth?

Stay tuned...I'll let you know tomorrow if I can still walk...

Happy Gardening!

XO ~

Julie


Monday, October 25, 2010

Rainy days and Mondays...

It's Monday. It's a rainy, gloomy Monday. The sky is gray, the yard is Carolina mud red, and soon, my pups and carpet will sport that lovely orangish-brownish tinge. I had such plans for today. I was going to plant my large kitchen garden, incorporating tulips, daffodils, and Dutch iris bulbs throughout the edibles so that I'd have an endless supply of my favorite spring flowers. Instead, I'm fighting the urge to curl up on the couch with my blanket and take a nap.

Honestly, the only thing keeping me from the nap is the chance that Peter might come home for lunch. I think he has a meeting, but I'm not going to chance it.

Rather than endure potential ridicule from my hubby (which would be well-deserved), I'm contemplating a clean-up. Truly, our house is bursting with junk. We're starting a remodeling project soon, but first we need to purge. Add into the equation that I'm room mom for both Kristen and Michael's fall parties on Friday, and I'm overwhelmed with plastic pumpkins, construction paper, and bags of candy. Really, what was I thinking? I need a clone.

OK. The house is too overwhelming. I don't know about you, but whenever I spend hours de-cluttering, the kids manage to re-clutter it within about 20 seconds. I don't think I have the patience for wasted work today.

Instead, I thought I'd share one of the few spots that is (currently) perfectly organized.

The potager.


C'est joli, n'est-ce pas?

A potager, for those of you who avoid pretentious gardening terms, is simply an organized kitchen garden. Pronounced “puh ta zhay,” the potager design precedent is from the Gardens of the French Renaissance and Baroque Garden eras. Often flowers, both edible and non-edible, as well as herbs are interplanted with vegetables and fruit to enhance the garden's beauty. (Plus, the flowers attract beneficial insects.) The potager is aesthetically pleasing but also functional. From formal knot gardens to cozy cottage gardens, potagers vary in size, shape, and design.

I'm addicted to garden magazines, particularly ones that showcase gorgeous, perfectly constructed edible gardens. The most recent edition of Mother Earth News is a perfect example of gardens that make me weep with their perfection. I buy gardening magazines obsessively, determined that our kitchen gardens will be lush, perfect. 

But it's not always easy to achieve my goals. 

Did you see the movie It's Complicated? I watched the scene which showed Meryl Streep's impeccable kitchen garden at least a dozen times, taking notes on what the set designers were growing in that gorgeous potager...until I realized that they had tomatoes and cabbage growing at the same time.  Later, I read that the tomatoes were actually wired to the vines to ensure the perfect garden specimens. 

Ah, Hollywood. How you torment me.

Our potager originated from my desire to design a formal vegetable garden close to the house, while attempting to hide the backyard damage caused by our dogs. Sun is scarce in our yard, which makes growing grass a challenge. Add into the equation two puppies...


...who use the backyard as their personal race track/agility course, and suddenly—there's no vegetation in site. So, last autumn, I persuaded Peter to build a potager in the midst of the mud—but where there's a patch of sun. He loves when I have brainstorms, really, he does. I'm sure of it, no matter how often he rolls his eyes. It challenges him to take my fantastical, seemingly simplistic (to me) ideas and turn them into reality. Honestly, how long could it take to whip together the basis for a kitchen garden?

Well. With my Swiss husband, precision isn't good enough. Perfection is the standard.

I must admit, I've learned a thing or two from him about planning. First, he drew a design, measured and marked off the shape of the garden.


Next, he enclosed the area with easy-to-install fencing that we found at Lowe's. The fence serves an obvious purpose...keeping Sophie and Chloe from racing through the garden. It also provides support for vertical growing. In the spring, peas climbed the fence, while this summer it supported tomato plants and beans.

After enclosing the space, he began outlining the beds with stone. We then filled each quadrant with compost and soil. 


Finally, he installed a stone base for the large container and filled the paths with pebbles.

Now, it was my turn.

My first step was to decide what my family would eat, because I wanted to involve the kids in growing food and eating from the garden. Unfortunately, our children are vegephobes. I know my parents are enjoying a good chuckle over this while they drink their Bloody Marys in the great beyond, as I was the worst, pickiest eater. My childhood vegetable repertoire consisted of plain Iceberg lettuce (no dressing), corn, and potatoes.

My children follow in my footsteps. Sorry.

So, to encourage the kids, I planted a border of strawberries in the potager, which was a hit. Obviously, the strawberries are a permanent garden fixture. Various lettuce and spinach plants were added, as well as radishes and a border of violas. 


The first season was OK. It didn't meet my expectations for a lush, bountiful, beautiful kitchen garden, but we did have an excellent harvest of strawberries and lettuce.

This fall, I became a little more thoughtful in my approach. I even made a plan.


It's highly professional, don't you think?


First, I cleaned up the remaining tomato plants and most of the peppers from the summer garden. I honestly don't have a good photo of the summer potager, because it quickly became overrun with tomatoes and, frankly, was just unattractive. So much for my desire for an organized, aesthetically pleasing garden space. It produced well, though. I also pulled up the basil and froze it for future pesto.


For our 2010 fall planting, I started with some transplants—red and green romaine lettuce, bibb lettuce, cauliflower, brussel sprouts, pak choy and chives. Yellow violas provide an edible flower border inside the fence.

Once the transplants were in place, I selected several varieties of heirloom lettuce, spinach, and radishes to direct sow:

Lettuce
Sanguine Ameliore
Lollo Bionda
Forellenschluss
Amish Deer Tongue
Lollo Rossa
Brune d'Hiver

Spinach
Merlo Nero Spinach
Bloomsdale Long Standing Spinach

Radish
French Breakfast Radish
Cherry Belle Radish


(You can see the seedlings emerging in the rows between the transplants.)


Also, I started some additional seeds under lights to transplant out later:
Violette Italia Cauliflower (purple)
Giant of Naples Cauliflower
Romanesco Italia Broccoli
Calabrese Green Sprouting Broccoli

Added to the center container of Greek oregano, persimmon, and lemon thyme were several lettuces and violas.


I must admit—I'm pretty happy with the potager so far this fall. I planted a little later than I planned, but the plants are growing well, and the seedlings are looking good. I'm hoping to get out tomorrow and thin the seedlings.


Wait.

What's that? In the back corner.

I didn't plant those.

ACK. Those are definitely NOT spinach seedlings.

So much for my little bit of organization...the weeds are taking over. Just like the clutter in the house.

Sigh.

(Still, I'd rather pull weeds any day than clean the house...)

The rain is gone. I suppose I'd better tackle those weed seedlings so at least something in my life is organized.

So much for that nap...it's time to fight weeds. Wish me luck. Please?
 
Are you growing any cool season crops? What and where are you planting? And--have you had the first frost in your zone yet?


I hope these babies make it through the winter...

Happy gardening!


Friday, November 6, 2009

Good dirt.

It’s beginning to feel like fall here in South Carolina. Last night, I covered my newly planted strawberries and lettuces in case we had a freeze. Leaves completely cover our yard...we must have a hundred trees, easily. The jack-o’-lanterns are moldering on the front steps. Don’t you just love when those gorgeous, orange works of art turn black and smooshy? It's not very festive. We so rarely use our front door that I often forget about the pumpkins until they become a very unwelcoming addition to our welcome mat.


I’ve always felt a little blue, tossing the pumpkins in the trash the week after Halloween. Maybe it’s because the kids worked so hard designing their jack-o’-lanterns. Maybe I feel guilty, since it’s wasteful to carve them for Halloween and throw them away a few days later. Maybe my angst is more psychologically driven--tossing the pumpkins signals winter coming--at least, to me. I’m not a happy winter person.

Until recently, I never really worried about throwing the pumpkins in the trash. Honestly, the pumpkins get nasty, the big plastic garbage bag comes out, I hold my breath and roll the disgusting decomposing orbs into the bag, pray
ing that the bag doesn’t break on the way to the trash can.

Think about it, though--why is it OK to throw pumpkins into the trash when yard debris isn’t allowed? In fact, some communities, such as Loveland, Colorado, offer recycling services for pumpkins. My community doesn’t offer standard recycl
ing pick up for newspaper or bottles, so I won’t hold my breath for them to pick up moldy pumpkins.

Still, you can recycle that pumpkin. Compost it.


We’ve been composting for a long time...unofficially. We’d ju
st pile up leaves and grass clippings in the forest, turn it occasionally, and end up with great compost after about a year. Now that we’ve begun our eco-experiment, I’ve become compulsive about composting to reduce our trash output. You know what? Between stepping up our composting and recycling efforts, we are producing only about two 13-gallon bags of trash per week. I’m pretty proud of our reduced trash!

Composting is a fantastic alternative for turning yard and kitchen waste--and even paper--into rich “black gold.” Tiny organisms--bacteria, fungi, and protozoa--break down kitchen and landscape waste into dark, rich, decomposed org
anic matter. Compost improves soil--add it to clay, it helps break up the heavy soil and enriches it with nutrients. Add compost to sandy soil, and it helps the soil retain water and nutrients. Improving soil is the best way to ensure healthy plants.

Take a look at the new garden I’m working on--a potager, aka French Kitchen Garden.


See the soil I’m dealing with? Can’t grow anything in that red clay. Now take a look at what we added:


We’ll be eating well with that rich soil.


I know that not everyone is as obsessive about gardening as I am...but even if you only plant pansies around your mailbox or marigolds in your window box, you can benefit from compost. If you don’t garden at all, you can still compost to reduce the amount of trash you contribute to the landfill--and offer your compost to your gardening neighbors or advertise it on Craigslist or Freecycle. Or send it to me, I always need compost!

I know what you’re thinking: composting is a huge project. It’s expensive, it’s time-consuming, it stinks, we’ll have rats in our yard, the neighbors will complain...I know. I also thought those thoughts.


I was wrong.

Composting is as simple as collecting leaves, grass clippings, and food scraps in an open pile in your yard...or as complex as building a three-bin compost system, with a companion leaf-mold collector. You can invest hundreds of dollars on composters offered by companies that advertise “black gold in as little as two weeks!” www.gardenersupply.com. Or you can pick up pallets free of charge and construct your own rustic composting bin. www.planetsave.com There are even composting systems available for apartmen
t or condo dwellers. www.webecoist.com.

Our composting system evolved, from the open pile hidden in the forest, to a fabulous design of Swiss precision and engineering. When I mentioned to Peter that I wanted an official compost bin, thinking we’d use some spare pallets fr
om our company and slap it together in an hour...little did I imagine the result:


“Slapping together” is not really in Peter’s personality. He gets his perfectionism honestly: many years ago, right after Kristen was born, his parents were visiting. We had just remodeled our unfinished basement, and I mentioned that we needed a handrail for the stairs. I thought--go to Lowe’s, buy a piece of wood, slap some paint on it--voila!

You should see the handrail crafted by my father-in-law...it’s a thing of beauty. I think he painted at least 10 coats of varnish on it.
Anyway, those Swiss men don’t do half-assed work. I wanted a compost bin, and by God--I got the premium version.

Your system needs to fit your personality, your needs, and your neighborhood. If you can shake hands with your next door neighbors from your bedroom window, then you might want an enclosed system located near the back of your property to preserve neighborly peace. If you live on a farm or have some acreage, an open pile might be fine for you. If you garden as much as I do, a three-bin system is perfect: one bin contains compost that’s ready for use; the second bin is compost that’s almost done cooking; and the third is the active pile where we deposit our scraps and such.


So, first of all...


What can go into the compost pile?

  • Leaves, pine needles, grass clipping, flowers and garden plants.
  • Kitchen scraps--fruit and vegetable peelings or cuttings, crushed eggshells, tea bags, coffee grounds and filters.
  • Shredded woody yard trimmings, small amounts of sawdust--but add a pound of nitrogen per 100 pounds of sawdust.
  • Paper towels, shredded newspaper--although I often save my newspaper to layer as a weed barrier under mulch.
Composting no-nos:
  • Clippings treated with herbicides or pesticides should not be used in a vegetable garden.
  • Meat, bones and fatty foods--no oils, cheese, or cooking oil. Those will attract critters.
  • Pet waste or human waste. (Really? Don’t want to grow your tomatoes in Fido’s poop?) Although, if your pet is a herbivore, you can add its waste to the pile--and it enriches the compost.
  • Weeds that have gone to seed or plants that are diseased. Technically, a compost pile should get hot enough to kill those seeds or insect-infestations...but why risk it? It can be tough managing the temperature accurately enough to eliminate problems.
Green + Brown = Black Gold
Ready for biology class? No, me neither. Here’s the basic information that you need to make sure that your compost has the right levels of carbon and nitrogen to ensure those little microorganisms thrive and the scraps break down quickly:

  • Leaves, straw, and sawdust are high in carbon--”browns”
  • Grass clippings, manure, and vegetable scraps are higher in nitrogen--”greens”
  • For the organic materials to decompose easily, the microorganisms that do the work need about 1 part nitrogen for every 30 parts carbon.
  • If the carbon to nitrogen ratio is too high, it will take a long time for the matter to decompose.
There’s a great chart that shows the average carbon to nitrogen ratio in organic materials, plus extensive information about composting: www.clemson.edu/extension/hgic

How big?

Bigger is better...to a point. The larger the surface area, the faster the microorganisms can work to make matter decompose. Chopping or shredding yard waste, such as leaves, helps increase the surface area.

An ideal size for a compost pile is at least 3 feet x 3 feet x 3 feet. Piles smaller than this can’t hold in enough heat for decomposition, and piles larger than 5 cubic feet don’t allow enough air to reach the center of the pile and the microbes. It’s also hard to turn a pile that’s too large...and you’ll need to turn it more often. Stick with a manageable size.


Turn, turn, turn.

Turning the pile is essential to supply oxygen to the composting organisms. Without adequate oxygen, you’ll have a smelly pile of material that can be potentially toxic to plants. If your compost pile smells rotten--it might not be getting enough air.


Water, please.

Moisture management is also an important element in composting. Too much water and the microorganisms will drown. Too little moisture will result in slow decay, meaning you’ll be waiting a long time for rich soil. You’ll want the compost pile to feel about as moist as a wrung-out sponge, according to the Clemson Extension website. (Which, by the way, is fabulous. You’ll find answers to all sorts of gardening dilemmas.)


Hot enough?

The center of the compost pile will heat up as the material decomposes. The interior temperature should range between 90 and 140 degrees. Yes, there are special long-stemmed thermometers to measure the temp. Do I own one? Nope. We've still managed to make great compost without the gadgets.

Is it done yet?
Just like any recipe, the final product is the result of its ingredients. Depending on the coarseness of the materials, size of the pile, amount of air and moisture, your compost can be ready in as little as a month--or it might take as along as a year. Honestly, our compost--which is turned minimally and basically left on its own to decompose--is typically ready in about 4-6 months. It’s good stuff...loamy and full of worms. Yum.


Now what?

Use compost to amend your soil, top dress lawns, enrich soil around trees and shrubs, or--as we do--create new raised beds. You’ll want to separate any large chunks out of the compost. You can even use the chunky compost to make compost tea--a weak nutrient solution that can be used to fertilize young plants. Put the compost into a cloth bag and allow to soak in a 5 gallon bucket of water for approximately two to three days. The resulting liquid should smell sweet and earthy. If it smells sour or rotten--do not use on plants. Return it to the compost pile. Free, non-petroleum based fertilizer...don't you feel greener already?

Final advice:

When you collect your kitchen scraps, you’ll definitely want a container with a lid. You’ll also want to empty it. Often. I, unfortunately, learned the hard way that kitchen scraps, like skin from pears or over-ripe tomatoes, can quickly lead to a nasty fruit fly infestation. Seriously, get a can with a lid. You’ll thank me.

Better yet, keep your container outside if it’s convenient. I have a bowl that I use during food prep to collect scraps, which I immediately dump into the container on our porch. I usually empty the container into the compost pile at least three times per week. Just don't let an open container sit for too long. Fruit flies are a pain to get rid of.

Also, remind your husband/significant other that he/she shouldn't bring the large container into the kitchen after it's been sitting outside with scraps in it to, oh, make it easier to dispose of pumpkin guts. I couldn't figure out why we had a swarm of fruit flies in the kitchen--until someone confessed (after a few glasses of wine) what he did. Argh.

So get ready! Except for the fruit flies debacle, composting is an easy, non-smelly, non-rodent attracting, eco-rific way to reduce your trash output, build fabulous soil, and enrich the environment with your selfless efforts.