Tuesday, July 16, 2013

Finding the Blooms in July.

Today is Garden Bloggers' Bloom Day, hosted by May Dreams Gardens. Usually, my biggest problem for July's Bloom Day is the overbearing South Carolina drought. 

Not this year.

This year, my challenge is to find blooms in the garden that haven't melted away due to the enormous amounts of rain Upstate SC is experiencing. Did you hear the sad new about the South Carolina Botanical Garden? They recently installed the Natural Heritage Garden, an exhibit that included many rare and endangered plants, and the torrential rains caused horrific damage to the garden.  If you'd like to donate to help rebuild the garden, you can find information here.

Crazy, crazy weather.

Still, even with our daily deluge of rain, I found a few blooms to share with you.


Casa Blanca lilies...my favorite. I fear a vole snacked on many of the bulbs, because these are the only few that I've seen this year.


The large kitchen garden is a tumble of overgrowth and unripe tomatoes. Honestly, the foliage is lush and green, particularly in the herb garden at the front of the raised beds.


The flowering herbs are major pollinator havens.
 

But although the garden is green and bursting with vines, everything is late. I've yet to find one cucumber. Last July, we were already searching for recipes to use up our insane harvest of cucumbers.


Tonight, we ate the first beans harvested from our Three Sisters Garden. The corn definitely likes the rain, but the squash vines below melted. I planted more squash seeds, hoping for a fall harvest.


I can only hope that the veggie garden experiences a quick burst of productivity in the bit of sun that reached it today. Bruschetta is calling my name...but I need my heirloom tomatoes to ripen! 


Everyone is confused. Typically, by July the gardenias are sleeping. Not this year--they continue to infuse the air with their delicious scent. 


In the newly planted pollinator garden, the monarda is a good example of too much rain. Don't you just want to hand it a towel? Poor thing.


The lemon balm, while usually just a bit of a nuisance, truly became a bully this summer due to all of the rain. Fortunately, its tiny blooms attract lovely little pollinators, so I'm giving it a warning. If it continues its ill behavior, there WILL be consequences.


The tall verbena is bent over, beaten by the rain. I'm too embarrassed to show you the full photo, because it proves that I'm a softie for trying anything to keep a few blooms in the garden, even when they need to be yanked out by the roots. I keep crossing my fingers that I'll walk out tomorrow morning, and it will be standing at attention, nice and straight.

I know. I'm pitiful.


'Rozanne' seems to have withstood the worst of the rain. 


But even the poor stargazers are too saturated to last long in bloom. 

Sigh. 


The blooms of the phlox also succumbed to the rain. Surprisingly, though, I haven't battled powdery mildew on the plant like I normally do.
 

Also, I'm typically battling black spot by now on the roses--but so far, not this year.


The buddleia seems to enjoy the gallons of water each day, thankfully. Our bees and butterflies congregated on the three bushes today, making me think I should keep the Epi-Pen a little closer while I took photos.

Fortunately, the bees were too busy with the flowers to bother with me. 


The beautiful daylilies I recently purchased revolted against their soggy new home. They're growing well, but they refuse to show their pretty faces. Yeesh, what prima donnas. These few daylilies planted last year were kind enough to add a bit of color to the perennial bed.


However, my trusty friends, the Japanese anemones, are preparing for an early show. They're full of buds, just about to burst any day. 
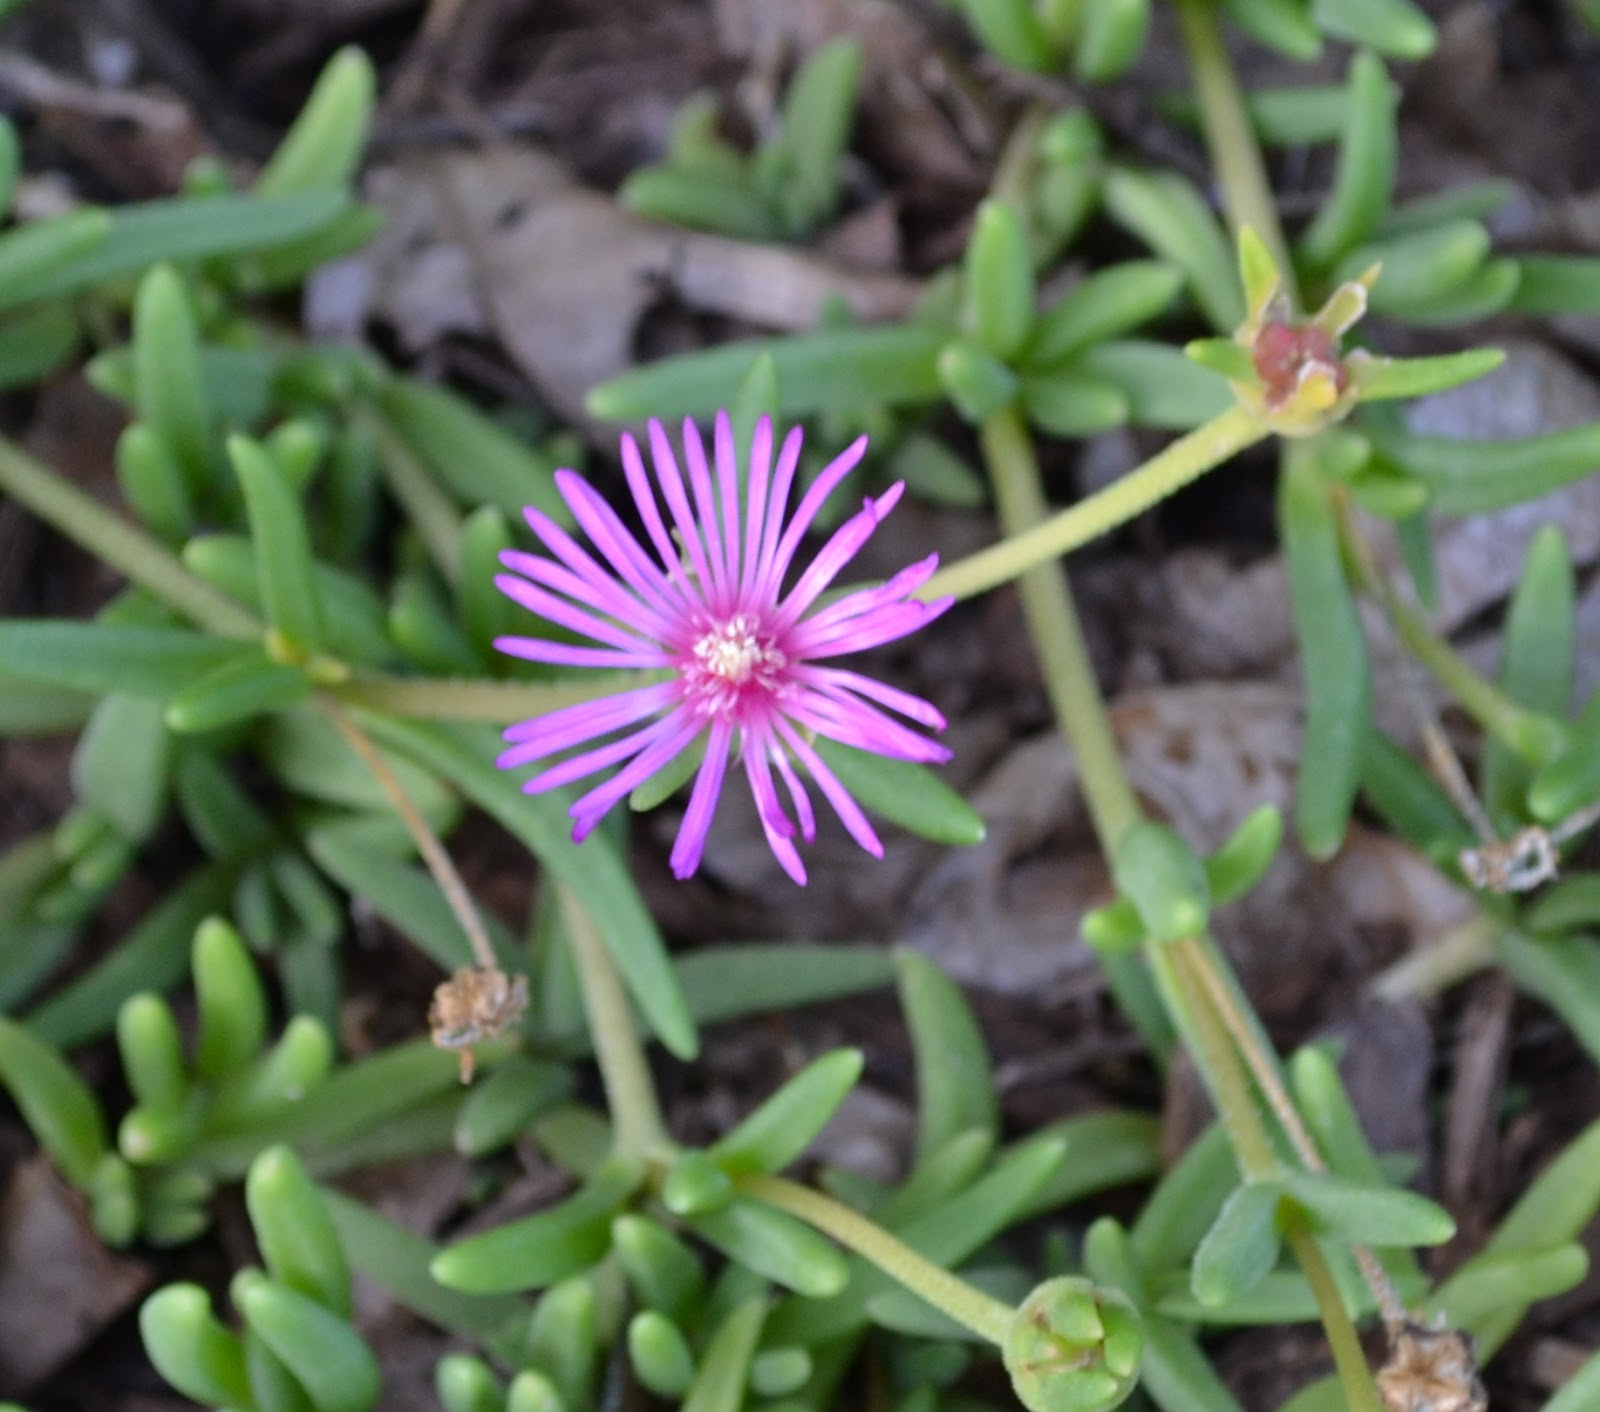
 

The little ice plant isn't loving all of the water, but it's a trooper and continues to produce a few cheerful blooms...
 

...and the gaura also tries to hang in there for me, withstanding the moisture and the attack of Japanese beetles. 


Have I ever mentioned how much I despise Japanese beetles?


Fortunately, the nasty beetles haven't damaged the lantanas throughout the garden. However, only the lantana in the mailbox garden is blooming. The others need Mr. Sun to shine down on them to encourage some color. Soon.


Now, we all know hydrangeas should enjoy water...right? For about a week, the hydrangeas looked magnificent. The Brides Blushed beautifully, the Twist & Shout partied hard in the garden, cute little Pee Gee beamed with blooms in the shade, and the oakleaf bushes drooped dramatic cones.

And then, the lovely flowers turned mushy.  

So. Depressing.


Thank goodness for the garden cheerleaders! Bright little Black-Eyed Susan vines add a touch of cheer in hanging baskets...


...while perky purple coneflowers refuse to melt under duress. 
 

I admit, I often curse rudbeckia. It's such a bully in the front perennial bed. The more I thin it, the more prevalent it becomes.

However, I'm rethinking my aversion to it. It's been a trooper during the summer storms, and I have to give it credit for the bright, lovely patch of cheer it's added to the entryway. 


Both Rose of Sharon bushes just began blooming--and they're heavy with buds. Thank goodness. I need some color in the back sitting area.


Mandevilla is so reliable. Honestly, I love this vine by the pool. Even the rain can't dampen its spirits.


The poor hardy hibiscus, though...it experienced a tough spring. First, the leaves served as a snack for every caterpillar and Japanese beetle in the garden until the leaves resemble lace. Then, the rain makes the blooms rather...sad. Normally, they're so perky and cheerful, but right now they just look so tired from the effort of opening.

  
My very happy surprise, however, is a new addition to the back garden by the pool: blackberry lily. A gift from my friend Janet's garden (aka The Queen of Seaford), these adorable little lilies produced blooms one week after transplanting them--and they just keep on going without complaint. I think they may be my new favorite plant! 

How's the weather in your garden? Wishing you rain (but not too much), pleasant days, and happy blooms!

XOXO ~

Julie


Wednesday, July 10, 2013

Garlic: A Stylish Display to Ward Off Vampires.

With a pre-teen girl in the house, there's bound to be a brief obsession with Twilight. I'll admit--I read the books, and I even went to the first movie with my book club friends. 

I know. My credibility is shot now, isn't it?

Until recently, though, the first movie ended my Twilight entertainment-spree. But then, somehow, our tween girlie entered the land of vampires and werewolves.

She became Twilight obsessed. 

Literally.

She read the book series four times. She watched the movies on a continuous loop. She even convinced me to stay awake until 2 a.m. to watch the remaining movies with her.

By the way--she's Team Edward all the way.

Finally, after weeks of vampire talk, we confiscated the books and movies and told her it was time to move on to other entertainment.

(Thank goodness for horses and all horseback-riding book and movie series.)

Truly, though, her obsession with vampires made me think we'd need to hang garlic around her neck to ward off future, potentially undead, boyfriends.

Instead, we decided to decorate the kitchen with our garlic harvest. It's still within easy reach should a vampire decide to pay a house call.


For several years, I've wanted to make a garlic braid to hang in the kitchen, but somehow--it never happened. As we all know, I'm not the craftiest person. I'll Pin all kinds of adorable garden crafts, but the reality is that my projects never turn out quite as I envision them. In fact, I've been known to buy all of the components for a project--and then chicken out, fearing my disappointment when my efforts don't measure up to the original project.

I think I have Pinaphobia...the fear of craftiness failure.

But honestly, a garlic braid? That shouldn't be complicated, right?

Here's a reality check: my vampire-crazy girl just got her first French braid--at the hairdressers'. 

You see, I can't braid.

Well, I can't French braid.  And from what I read, making a garlic braid is much like French braiding--you keep adding in pieces (in this case, garlic stems) to form the braid.  

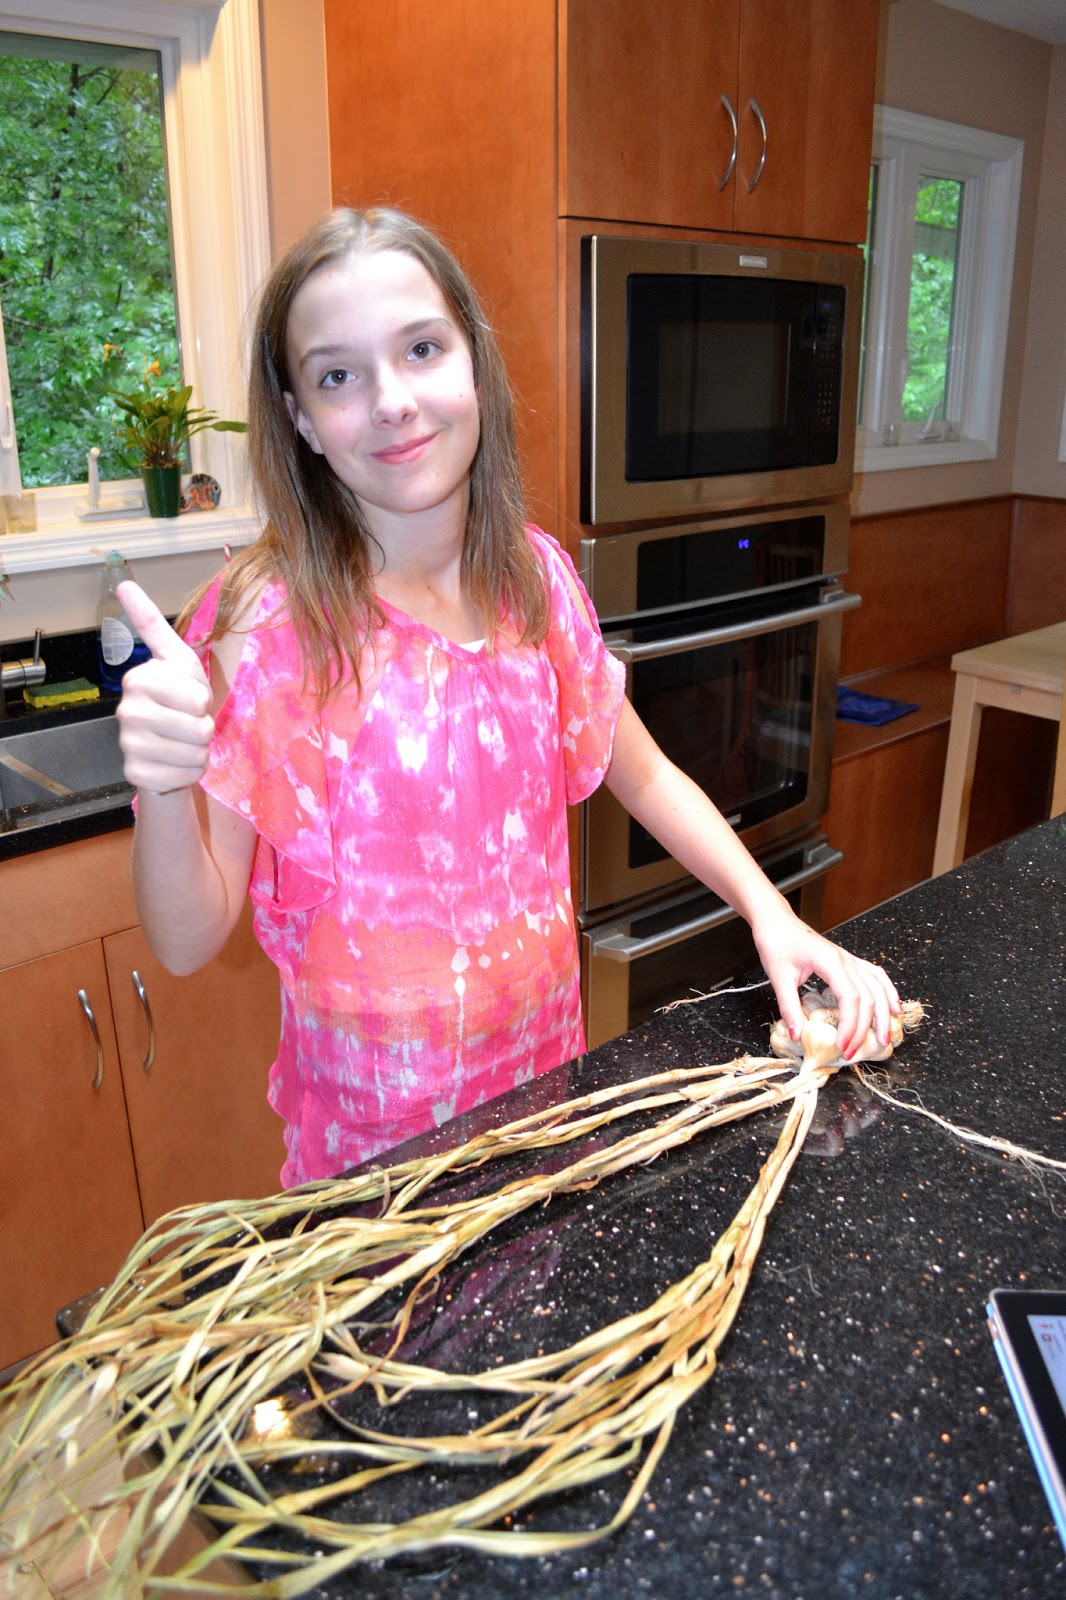
Because Kristen constantly braids horse tails and manes, the thought of braiding doesn't throw her into a panic. She volunteered to make the braid, while I played photographer.

(Perfect. A mother/daughter crafting activity that requires no crafting from this mom!)

Before the braiding begins, you first need some garlic.

Obviously.

Fortunately, two weeks ago, I harvested our garlic. It was one of those evenings when I trudged to the garden in my decent clothes, just to take a peek at the beds, and wound up harvesting garlic because it suddenly looked ready.

I know. This is why I never have any decent clothes--they're all stained and nasty from my impromptu garden forays.

After harvesting garlic from the garden, it needs to cure for about two weeks in a shady location. The racks in our garage provided the perfect garlic-curing station. Of course, my poor Prius sat in the driveway, but our garage smelled like an Italian restaurant for two weeks. Mmmm. 


Don't wash the garlic--just remove as much soil as possible. After the garlic dries, the soil will be easier to brush off the bulbs.

If you didn't plant garlic last fall, never fear--visit your local Farmers' Market and buy some beautiful softneck garlic (with the stems still attached.) I saw gorgeous varieties at my local market last Saturday.

Remove as much soil as possible from the bulbs. You can use a soft toothbrush, or you can use a brightly painted fingernail to remove the dirt and outer wrapper of the bulb. Using scissors, trim the roots of the bulbs to about 1/2 inch.


Several sites recommend soaking the leaves (which I'm referring to as stems, although softneck garlic doesn't really have "stems") of the garlic to make them more pliable. Our garlic stems were quite flexible, so we didn't bother with this step. If your garlic is extremely dry or brittle, you may want to place the stems between two wet towels until the stems soften and bend easily. 

Cut two pieces of twine, approximately two feet in length. Select three large softneck garlic bulbs and place them side-by-side, with the center bulb slightly lower. Only use softneck garlic, as hardneck garlic will not be pliable enough to braid.


Tie one piece of the twine around the stems, just above the three bulbs, forming a secure knot. (You can trim the twine later so that it doesn't show.)


Now the fun begins. Cross the right stem over the middle, then cross the left stem. The first, easy step in braiding.


Now, the fun begins. Add another bulb to the right, but place the stem in the middle. Cross the right stem over the two middle stems. The "right" stem is now in the center. Then add another bulb to the middle, again keeping the stem in the center. Cross the left stem over the middle. Now, the "left" stem is in the center. Add another bulb to the left side, stem centered, and cross the new left pieces over the additional stem.


Continue adding bulbs, always aligning the new bulb's stem with the center stems, then crossing over.


So glad my girl volunteered to help, because I can't imagine trying my hand at braiding--and juggling the camera. There's no way it would have ended well.


For the first braid, we selected 13 bulbs. As we reached lucky 13, we centered it at the top. Once all of the bulbs were braided in, Kristen continued braiding the stems, forming a nice, even six-inch braid.


Finally, using the second piece of twine, she tied off the braid, first making a knot to secure it, and then adding a bow for cuteness.


Pretty cute, don't you think?


Inspired by my daughter's braiding ability, I tried my hand at it, making a longer braid of some of the smaller garlic bulbs.

I'm just not meant for projects like this. I kept confusing myself, trying to remember which stem needed to cross where. Good grief.


Still, I didn't give up, and we now have two garlic braids hanging in the kitchen, within easy reach should Edward Cullen decide to appear.

And I've promised Kristen that I will watch many YouTube videos to learn how to French braid this summer.

It's the least I can do, because too soon she won't want me invading her space and helping with her hair.

(But if we keep lots of garlic in the house, perhaps we won't need to worry about ANY boys--undead or alive--for awhile!)

Do you have a favorite garlic recipe? Mine is shrimp scampi, which you can find here.

Happy braiding!

XOXO ~

Julie

Thursday, July 4, 2013

Hug a Bee! Protect Our Pollinators.


Who said summer is stress-free and relaxing? Good grief, we've been on the go more in the past three weeks of summer vacation than during the school year! Last week, I tallied 159.3 miles driven in ONE DAY, taking the kids to zoo camp and horseback riding lessons. 

Thank goodness I drive a Prius.

Still, I've felt a little stressed this summer for another reason, and it has nothing to do with spending hours in a car.

Our garden is curiously bare.

The pollinators are missing.
 

Granted, I've seen a few. But in our organic garden, we normally find dozens of caterpillars, happily munching on fennel, dill, and parsley. We watch hummingbirds chase one another around the lantana and the feeders. Butterfly photos crowd my camera, as I try to capture just one. more. shot.

And the bees? Normally, I'm making certain my Epi-pen is within easy grasp.

But this year, the garden is disturbingly quiet.

We've always planted for the pollinators. Whether it's including host plants for larva, like fennel and parsley, or ensuring we have many blooming nectar sources, pollinators typically party in our gardens.


We don't spray--not even organic pesticides, as we know those "safe" sprays can also kill beneficial insects.

Sadly, though, we can't control our neighbors' actions. 

Of course, we worry about colony collapse disorder, but did you hear about the travesty in Oregon, with pesticides killing more than 25,000 bumblebees? Even if we practice organic growing and invite pollinators to our gardens, a mass destruction of pollinators by one irresponsible landscaping company dramatically impacts the ecosystem.

And then, on the heels of the Oregon disaster, 37 million honeybees died in Elmwood, Ontario. The cause? Experts point to insecticides called neonicotinoids, used in planting corn and other crops, as the likely culprit.

It's heartbreaking. Obviously, our garden is not alone in pollinator decline.

Have you seen the photos from Whole Foods Market making the rounds on Facebook? Without pollinators, our selections for dinner look rather bleak.


Ironically, this spring I added two small pollinator gardens near our large kitchen garden, hoping to showcase the importance of planting for pollinators. Granted, I installed the gardens quickly prior to the CFSA Farm Tour so that we could jump-start conversations about the need to protect pollinators. (We already have many host plants in the herb garden and forest surrounding the raised beds.)

It worked well--at least, in launching conversations. But to my dismay, many of the host plants remain pristine, while in previous years we joked about the decimated dill and holey parsley. We WANT these plants to look ratty and tattered, because it means that lovely little caterpillars are getting the nutrition they need to become beautiful butterflies.


Bees and butterflies aren't alone in needing protection. Pesticides affect birds, too, killing off their food sources and impacting their health. Other pollinators, like bats, are succumbing to disease. White-Nose Syndrome, a fungal disease, is responsible for killing millions of bats. While bats are known to eat mosquitoes, we often overlook their contribution to agriculture. Not only do they feast on crop-damaging caterpillars, but they also pollinate certain plants, like agaves. Along with the disease, pesticides also contribute to population decline.


With the bleak news, what can we do to protect our pollinators?


Plant a pollinator garden--You Can Grow That!


First, though, take a pledge to eliminate pesticides in your garden--and encourage your neighbors and homeowners' associations to ban pesticides, too. Honestly? Even "natural" pesticides wreck havoc on beneficial insects. Hand picking pests is much healthier for the environment than spraying poison.


Next, familiarize yourself with the species that live in your area and plant larval host plants, as well as nectar sources, suitable for those pollinators. You can find a list of butterflies in your area by entering your zip code here.


When planning your pollinator garden, choose a variety of plant materials that will provide nectar sources throughout the season. Mix early blooming, mid- and late-blooming annuals and perennials to ensure an adequate supply of food and energy for the pollinators. 

Water, too, is important for attracting pollinators. Birds, bees, and butterflies all benefit from water sources in your garden, from a bird bath or pond to a shallow dish of water. Also necessary is shelter for pollinators. Add a bat box to your garden. Plant trees to encourage nesting. Learn the pollinator species common to your area, and encourage them to make your garden their home.


For instance, Eastern Tiger Swallowtail butterflies reside in my area in South Carolina. When planning our pollinator garden, I looked here to find their host plants, as well as their favorite nectar sources. The caterpillars consume leaves on many of the trees in our forest, such as wild cherry, sweetbay, tulip tree, birch, ash, cottonwood, and willow. For this butterfly, I didn't need to add a host plant, as we already have numerous trees on our property to provide food for the caterpillars. However, I did add some nectar sources. While they enjoy lilac, the bloom time is short in SC, so I added milkweed and Joe-Pye weed to the mix.

Additionally, some plants attract more than one type of pollinator. Passion flower, for instance, serves as a host plant for gulf fritillary caterpillars, while attracting hummingbirds and butterflies with its stunning purple flower for nectar.


Also in my area, black swallowtails use dill as a host plant, with caterpillars consuming the herb. Dill is another good dual purpose plant in a pollinator garden, though, because its flowers also attract lady bugs, predatory and parasitic wasps.

For a list of perennials and annuals to plant in your pollinator garden, check here

Planning and planting a pollinator garden is a perfect family activity. Many of the plants are easily grown from seed, such as zinnias and sunflowers, and the garden provides an excellent learning opportunity to teach our next generation of gardeners the importance of growing sustainably to protect our pollinators. There are many stories to tell and lessons to learn in growing a pollinator garden.

Besides, who doesn't get a thrill when Ms. Monarch pays a visit?

I know I do!

Here's hoping that perhaps our lack of pollinator activity is due to our very wet spring--crossing fingers and toes that with a little more sunshine, we'll find a pollinator party in the gardens.

XOXO ~

Julie

You Can Grow That! is hosted on the 4th of each month, with garden writers sharing the joys of growing gardens.

Shared with From the Farm Blog Hop and The Backyard Farming Connection.

Sunday, June 9, 2013

Celebrate Spring with Strawberry Muffins.

Are you still awake? Oh, good. I know it's late, but since tomorrow is Monday, I really, really think you need to stay up just a little longer to ensure a happy start to your week.


Honestly, it's been such a wet and gloomy weekend here, and tomorrow looks like more of the same. The good news? School's out for summer! (Sing along if you like!) The bad news? The wet weather ushers in the end of strawberry season.


We eagerly await the first strawberry of the season. After all, what announces spring more than a scrumptious, juice-dripping, warm-from-the-sun strawberry? Then, in a blink of an eye—and maybe because we're all so wrapped up with end of school year programs, finals, awards days, playoff games, camp registration, and the assorted noise of every day—the strawberry sign pointing to the farm vanishes.


In a panic, I drove by, only to see “Sold Out” handwritten on a paper taped to the farm stand door. The strawberries in our garden are dwindling, so it shouldn't come as a great surprise that the farm by us would be done, too. But, with the craziness in getting ready for the farm tour, I completely forgot to freeze strawberries to get us through to next spring. 

So, like any good locavore, I sent out an emergency plea to my Facebook friends to find out if strawberries could be found.


Thank goodness for social media, because within moments, I had the names of three farms still selling berries. Within two hours, I returned with two gallons of strawberries in my possession.


Whew. Disaster averted.


Here's the thing: you need to make these muffins immediately, while you can get your hands on fresh strawberries. Although you can use frozen berries, it's just not the same celebratory spring muffin. I'm sure it's good, but the best part of baking strawberry muffins is savoring one fresh-from-the-garden, delicious strawberry that emits the sweet scent of spring while you chop the other berries to add to the mix. The aroma alone will make your mouth water.


I made these muffins for the CFSA Upstate Farm Tour, and they seemed to be a hit. In the next batch, though, I experimented with adding a streusel topping—and I liked it even better. (I should have taken a photo with streusel. Sorry.)


Strawberry Muffins

(Makes 18 muffins)


Ingredients
3 cups all-purpose flour
1 tablespoon baking powder
1/2 teaspoon baking soda
2 tablespoons ground cinnamon
1-1/4 cups milk
2 large eggs, beaten
1/2 pound (2 sticks) unsalted butter, melted
2-1/2 cups diced fresh strawberries
1-1/2 cups sugar

Directions:

Preheat the oven to 375 degrees. Line muffin pan with paper liners or grease muffin pan.

Combine flour, baking powder, baking soda, salt, and cinnamon in a large bowl, mixing thoroughly. In a separate bowl, combine the milk, eggs, and melted butter. Add the liquid ingredients slowly into the flour mixture, mixing until just combined. (There will be some lumps in the batter.) Add the strawberries and sugar to the batter, stirring gently to combine.

Spoon the batter into the muffin cups to fill the liners ¾ full. Sprinkle streusel topping (see below) on top of the muffins. Bake for 20 to 25 minutes, until a toothpick inserted into muffin comes out clean and the muffins are lightly browned.

Streusel Topping

1-1/3 cups sugar
1-1/3 cups flour
1-3/4 tablespoons water
3 teaspoons cinnamon
1/2 cup butter, softened

Mix all ingredients until crumbly.


Now, with a warm strawberry muffin in your tummy, the challenge of Monday seems less daunting, doesn't it?


Hope you have a lovely week!


XOXO ~


Friday, June 7, 2013

Turning Lemons into Lemon Rosemary Shortbread Cookies.


Each year, during the Carolina Farm Stewardship's Annual Upstate Farm Tour, the kids set up a lemonade stand and sell sweets made from ingredients grown in our garden. Typically, I bake lavender shortbread cookies—but this year, the lavender wasn't blooming in time for the tour. Instead, I harvested some rosemary from the front garden, minced it until it was nearly powder—honestly, I just don't like the texture of chunks of rosemary—and baked lemon rosemary cookies.


A friend gave me the recipe, which I modified a bit—I'm also not a fan of grated lemon peel. I just dislike the texture of it, so I omitted the lemon peel.


I'm crossing my fingers that next year we'll have our own lemons to use to flavor the cookies, too.


Lemon Rosemary Shortbread Cookies.


Ingredients
1 cup butter, softened


3 tablespoons fresh lemon juice

1/2 teaspoon vanilla extract


4 teaspoons fresh rosemary, minced well

1/4 teaspoon salt


Directions:

In a large mixing bowl, cream butter and sugar until fluffy. Add lemon juice and vanilla, mixing well.

In a separate bowl, combine the flour, rosemary and salt. Slowly add dry ingredients to the creamed mixture. Mix thoroughly.

Divide dough and roll into two, approximately 12-inch logs. Wrap each roll in plastic wrap and place in the freezer for about 30 minutes to chill. Remove from freezer and cut logs into 1/4-inch slices. Place sliced dough on ungreased baking sheets, with cookies spaced about 2 inches apart. Bake at 350° for 8-10 minutes, until edges turn golden brown. Cool for 2 minutes before removing from pans. 

Note: these cookies, while delicious, are fragile and tend to crumble or crack, so take your time! It's worth it, I promise. Makes approximately 8 dozen cookies.


Stay tuned...tomorrow I'll post the recipe for the strawberry muffins—perfect for a weekend breakfast!


Happy weekend!


XOXO ~


Julie