Showing posts with label Shrimp Scampi. Show all posts

Wednesday, July 10, 2013

Garlic: A Stylish Display to Ward Off Vampires.

With a pre-teen girl in the house, there's bound to be a brief obsession with Twilight. I'll admit--I read the books, and I even went to the first movie with my book club friends. 

I know. My credibility is shot now, isn't it?

Until recently, though, the first movie ended my Twilight entertainment-spree. But then, somehow, our tween girlie entered the land of vampires and werewolves.

She became Twilight obsessed. 

Literally.

She read the book series four times. She watched the movies on a continuous loop. She even convinced me to stay awake until 2 a.m. to watch the remaining movies with her.

By the way--she's Team Edward all the way.

Finally, after weeks of vampire talk, we confiscated the books and movies and told her it was time to move on to other entertainment.

(Thank goodness for horses and all horseback-riding book and movie series.)

Truly, though, her obsession with vampires made me think we'd need to hang garlic around her neck to ward off future, potentially undead, boyfriends.

Instead, we decided to decorate the kitchen with our garlic harvest. It's still within easy reach should a vampire decide to pay a house call.


For several years, I've wanted to make a garlic braid to hang in the kitchen, but somehow--it never happened. As we all know, I'm not the craftiest person. I'll Pin all kinds of adorable garden crafts, but the reality is that my projects never turn out quite as I envision them. In fact, I've been known to buy all of the components for a project--and then chicken out, fearing my disappointment when my efforts don't measure up to the original project.

I think I have Pinaphobia...the fear of craftiness failure.

But honestly, a garlic braid? That shouldn't be complicated, right?

Here's a reality check: my vampire-crazy girl just got her first French braid--at the hairdressers'. 

You see, I can't braid.

Well, I can't French braid.  And from what I read, making a garlic braid is much like French braiding--you keep adding in pieces (in this case, garlic stems) to form the braid.  

Because Kristen constantly braids horse tails and manes, the thought of braiding doesn't throw her into a panic. She volunteered to make the braid, while I played photographer.

(Perfect. A mother/daughter crafting activity that requires no crafting from this mom!)

Before the braiding begins, you first need some garlic.

Obviously.

Fortunately, two weeks ago, I harvested our garlic. It was one of those evenings when I trudged to the garden in my decent clothes, just to take a peek at the beds, and wound up harvesting garlic because it suddenly looked ready.

I know. This is why I never have any decent clothes--they're all stained and nasty from my impromptu garden forays.

After harvesting garlic from the garden, it needs to cure for about two weeks in a shady location. The racks in our garage provided the perfect garlic-curing station. Of course, my poor Prius sat in the driveway, but our garage smelled like an Italian restaurant for two weeks. Mmmm. 


Don't wash the garlic--just remove as much soil as possible. After the garlic dries, the soil will be easier to brush off the bulbs.

If you didn't plant garlic last fall, never fear--visit your local Farmers' Market and buy some beautiful softneck garlic (with the stems still attached.) I saw gorgeous varieties at my local market last Saturday.

Remove as much soil as possible from the bulbs. You can use a soft toothbrush, or you can use a brightly painted fingernail to remove the dirt and outer wrapper of the bulb. Using scissors, trim the roots of the bulbs to about 1/2 inch.


Several sites recommend soaking the leaves (which I'm referring to as stems, although softneck garlic doesn't really have "stems") of the garlic to make them more pliable. Our garlic stems were quite flexible, so we didn't bother with this step. If your garlic is extremely dry or brittle, you may want to place the stems between two wet towels until the stems soften and bend easily. 

Cut two pieces of twine, approximately two feet in length. Select three large softneck garlic bulbs and place them side-by-side, with the center bulb slightly lower. Only use softneck garlic, as hardneck garlic will not be pliable enough to braid.


Tie one piece of the twine around the stems, just above the three bulbs, forming a secure knot. (You can trim the twine later so that it doesn't show.)


Now the fun begins. Cross the right stem over the middle, then cross the left stem. The first, easy step in braiding.


Now, the fun begins. Add another bulb to the right, but place the stem in the middle. Cross the right stem over the two middle stems. The "right" stem is now in the center. Then add another bulb to the middle, again keeping the stem in the center. Cross the left stem over the middle. Now, the "left" stem is in the center. Add another bulb to the left side, stem centered, and cross the new left pieces over the additional stem.


Continue adding bulbs, always aligning the new bulb's stem with the center stems, then crossing over.
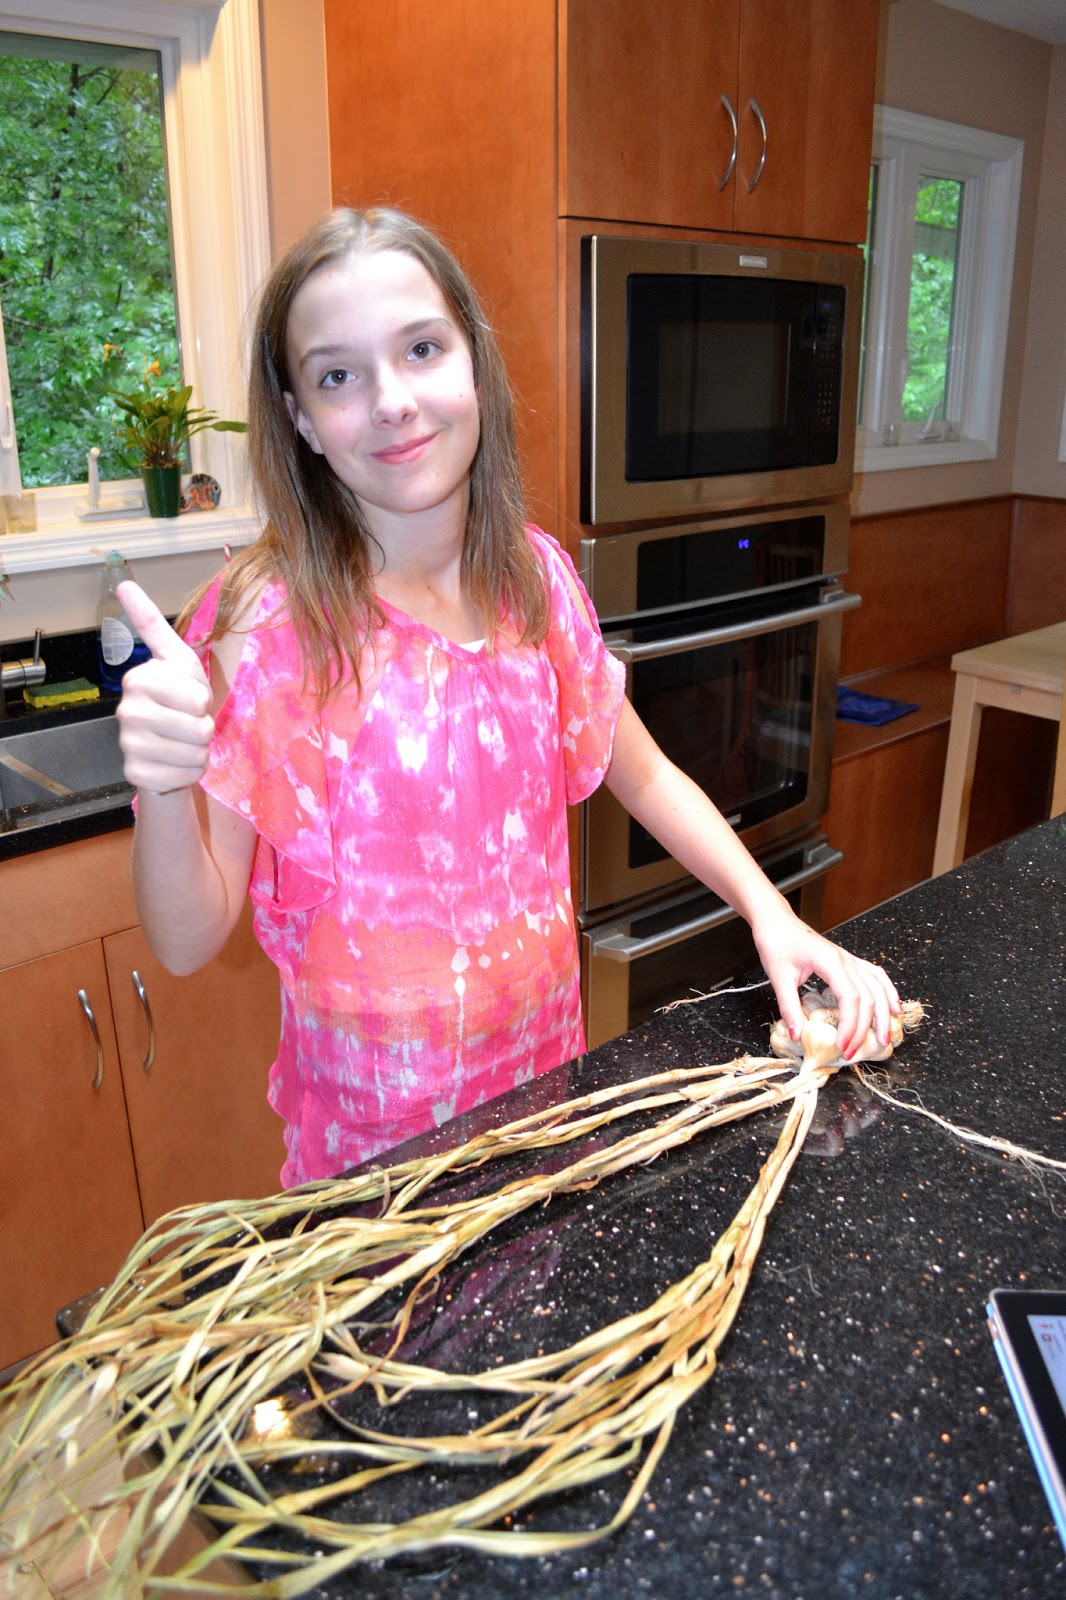

So glad my girl volunteered to help, because I can't imagine trying my hand at braiding--and juggling the camera. There's no way it would have ended well.


For the first braid, we selected 13 bulbs. As we reached lucky 13, we centered it at the top. Once all of the bulbs were braided in, Kristen continued braiding the stems, forming a nice, even six-inch braid.


Finally, using the second piece of twine, she tied off the braid, first making a knot to secure it, and then adding a bow for cuteness.


Pretty cute, don't you think?


Inspired by my daughter's braiding ability, I tried my hand at it, making a longer braid of some of the smaller garlic bulbs.

I'm just not meant for projects like this. I kept confusing myself, trying to remember which stem needed to cross where. Good grief.


Still, I didn't give up, and we now have two garlic braids hanging in the kitchen, within easy reach should Edward Cullen decide to appear.

And I've promised Kristen that I will watch many YouTube videos to learn how to French braid this summer.

It's the least I can do, because too soon she won't want me invading her space and helping with her hair.

(But if we keep lots of garlic in the house, perhaps we won't need to worry about ANY boys--undead or alive--for awhile!)

Do you have a favorite garlic recipe? Mine is shrimp scampi, which you can find here.

Happy braiding!

XOXO ~

Julie

Tuesday, October 12, 2010

Christmas in October.

It's October, but it feels like Christmas.

Look what arrived.


Nope. It's not the kids' Halloween costumes. That was a different box.

These are my treats.


Garlic.


Specifically, it's my “seed garlic.”

I'm ridiculously excited!

I know what you're thinking. “Garlic? You can buy garlic at Publix. Bi-Lo. All grocery stores sell garlic.”

True. But until you grow your own garlic...you've never really tasted garlic.

Last year was my inaugural attempt to grow this pantry staple. I mean, honestly—I usually pay 99 cents for a three-pack of basic, white garlic bulbs. It seemed a waste of time and effort to cultivate my own organic garlic.

But you know my gardening obsession. I had to try it.

Oh. It was so worth it.

I know you're skeptical, and I understand. Truly. Though garlic dates back thousands of years, cures 22 ailments, according to an Egyptian papyrus dating from 1500 B.C., and was found in King Tut's tomb, garlic was shunned in America until the twentieth century, due to its pungent, lingering aroma. In 17th century England, it was known that garlic was “...not for ladies, nor for those gentlemen who wanted to court them.” 

It's a good thing that Peter and I both like garlic.

Many herbalists believe garlic can cure the common cold, fight high cholesterol, serve as a natural antibiotic, and even repel mosquitos.

Plus, we all know the mythology involved with garlic—vampires, be gone.

(Well, unless you look like Edward Cullen.)

Garlic, and its culinary uses, arrived with the influx of immigrants into the United States. It wasn't until our new citizens arrived that garlic became a common, well-loved fixture in the kitchen, permeating the American culture with its flavor...and scent.

I'm so glad it did.

Honestly, could you imagine Shrimp Scampi without garlic?

The beauty of garlic is that it's incredibly easy to grow. I promise. In the fall, when your garden looks tired, and you're pulling up the last of your gangly tomato plants, you can keep your garden productive with very little effort. It's also a great crop to grow if you've never gardened. You dig a hole, place a clove in the hole, cover it up, add some mulch on top, water occasionally during dry spells, and viola! By June, you'll be harvesting fresh, flavorful garlic that is so much better than the grocery store variety.

Speaking of varieties...do you know how many kinds of garlic are available?

Neither did I. But I do now...

First, there are a couple distinctions. Softneck garlics, which can be known as Artichoke, Italian, or Silverskin, are the most commonly grown garlics in the world. These are the garlics that you traditionally see braided and hanging in rustic farmhouse kitchens. Orphio, or hardneck garlic, derives from wild garlic. Orphio forms a circle of cloves around a single, woody stalk, while softneck varieties form cloves in a spiral layer. Hardneck varieties traditionally perform better in cold climates.

Then, there's elephant garlic. Just to confuse things further--it's not a true garlic but a type of leek, with a mild flavor.

Who knew? I'm overwhelmed with options.

So, as is my habit when I can't make a garden-related decision, I bought a little bit of a lot. Here's what's awaiting planting:

Softneck:
Italian Braiding
Inchellium Red
Bianco Piacentina (white)
Viola Francese (purple/white)

Hardneck:
Music
German Extra Hardy (purple striped)
Rosso di Sulmona (red)

Elephant Garlic

OK. Maybe it wasn't such a little bit. Peter rolled his eyes when he saw the boxes.

Among some of my gardening friends, I've heard that seed garlic is selling out quickly this year. So, if you want to try growing your own garlic, here are two sources I use:

http://growitalian.com
http://southernexposure.com

Now, the fun begins!

Prep the garlic.

Prepping the garlic is very easy but a little messy. You're simply separating (or “popping”) the cloves. Each clove will grow into an individual bulb. If you are OCD about your varieties, like I am, only prep one variety at a time so they don't get mixed. I like to separate the cloves over a big bowl to catch the papery skins, then put the cloves for each variety in a labelled paper bag. DON'T PEEL THE CLOVES. If some of the skin comes off, you can still plant the clove—but it can bruise easily, so handle gently.


I considered farming out this task to the kids...until my thumbs started hurting after the second bag of garlic. I turned on some mindless TV and continued popping the cloves.

By the way...do you ever find yourself watching kid TV when there are no kids in the room?  I'm a little disturbed by this new habit of mine.

Although “Phineas and Ferb” is brilliant, you have to admit.

Prepare the bed.


A raised bed for garlic is great—but honestly, I just plant it in my larger kitchen garden, which doesn't have raised beds. I like to keep the rows about three feet wide so that it's easy to plant and harvest without stepping in the bed and compacting the soil. Add organic matter, like well-composted horse manure, and make certain the soil is well tilled. In South Carolina, I use a lot of compost to prepare our soil for planting—red clay is my nemesis.

Plant.
Within a day or two of popping the cloves, you'll want to get them in the soil. For best production, garlic needs to be planted in the fall to give it enough time to make sizable bulbs.

It's mid-October, so for me, that's my cue to plant garlic and pansies. Seeds from Italy recommends that northerners plant garlic after the first frost but 20-30 days before the ground freezes so that the garlic clove can begin to make roots. All garlic needs a period below 40 degrees to make bulbs.


I'm planting a lot of garlic, so my method of choice is to dig long trenches, about three inches deep, placing one clove of garlic root-side down approximately every six inches. In each bed, though, I'm going to plant several rows of garlic, staggering the placement of the cloves to provide ample growing room. Cover with soil and water well.


Oreo thinks it's really amusing to jump on my lap while I'm trying to work. Ignoring her isn't an option--she'll start kneading my leg with her claws if I don't fawn over her. Between kids and animals, it's amazing I ever get any work done.

Mulch.
After planting, it's important to add three to six inches of mulch to your bed. Shredded leaves and dry grass clippings are free and work wonderfully. I'm using straw, only because I have other plans for my leaves, which involves making a new front garden bed...but that's a different story for another day...

Mulch serves various purposes, depending on your climate. In the north, mulch will keep the ground moist and warm throughout the fall. In the south, it keeps the soil moist and cool. The mulch helps protect the garlic by minimizing the freezing and thawing that occurs in unprotected gardens, which can damage the garlic. Mulch also minimizes weeds.

And truly...who likes pulling weeds?

Well, OK. I do. On bad days when I'm annoyed, I kind of like yanking those nasty weeds out.

It's cheaper than therapy.

Winter.
Hibernate. Read recipes for garlic-laden Italian dishes and dream of scrumptious summer dinners. If you're having a really dry winter, make sure to water the garlic bed occasionally.

Spring.
In early spring, look for little shoots peeking through the mulch. As the shoots emerge and the weather warms, remove the mulch from the bed. Water during dry periods, and let the garlic continue to grow. For hardneck varieties, you will see the main shoot curl as it grows. These are known as scapes. Cut them off to make bigger bulbs, but don't throw them away—they are delicious braised in a bit of olive oil.

Harvest.
When the lower leaves of the garlic plant begin to turn brown, it's time to harvest—which is typically in June in mild climates, July in colder areas. Carefully dig up the garlic bulbs, leaving the stalks attached, and store in a well-vented location for several weeks to allow the garlic to cure. Do not put the bulbs in direct sunlight.

Store.
After curing, remove the stem (unless you plan to braid the garlic) and the outer papery layer of skin to ensure clean bulbs. Really, those garlic braids look so much better when there's not red clay attached to the bulbs. Store in a cool, dry location—and save a few of your largest bulbs for next year's planting!

And there, my friends, you have it. A plethora of pungent, flavorful garlic, plus enough left over so that you won't need to purchase starter garlic again.

Isn't garlic grand?

Just remember...make sure you share the wealth with your significant other...because eating garlic alone can make for a very lonely night.

Why don't you make this super easy, looks-way-more-fancy-than-it-is dinner for your honeypot tonight? (Honeypot is my new favorite word.) It's my go-to dinner, based on a recipe from my dad (who used the term "honeypot" in a letter to my mom) when I need a super quick meal that feels special.

Shrimp Scampi

1 lb. jumbo shrimp, peeled and deveined
½ cup unsalted butter (1 stick)
5-6 medium cloves garlic, pressed
1 tbsp. sea salt
1 cup white wine

Preheat oven to 450 degrees.

Clean shrimp and pat dry. Arrange shrimp in a single layer in a casserole dish. Do not let them overlap.

In a small saucepan, melt butter. Add garlic, sea salt, and wine, stirring until warm. Remove from heat, and pour butter mixture over the shrimp in the casserole dish. Place dish in oven, and bake for 5-7 minutes, or until all shrimp is thoroughly cooked. DO NOT OVERCOOK or shrimp will be tough.

Serve shrimp and garlic butter sauce over pasta, with a light grating of parmesan cheese on top.

Serves two very hungry adults, one 9-year-old who will eat three shrimp, and one 5-year-old, who will eat only plain pasta with cheese.

Or serves four adults with normal appetites.

Mint, anyone?