Showing posts with label garlic. Show all posts

Wednesday, July 10, 2013

Garlic: A Stylish Display to Ward Off Vampires.

With a pre-teen girl in the house, there's bound to be a brief obsession with Twilight. I'll admit--I read the books, and I even went to the first movie with my book club friends. 

I know. My credibility is shot now, isn't it?

Until recently, though, the first movie ended my Twilight entertainment-spree. But then, somehow, our tween girlie entered the land of vampires and werewolves.

She became Twilight obsessed. 

Literally.

She read the book series four times. She watched the movies on a continuous loop. She even convinced me to stay awake until 2 a.m. to watch the remaining movies with her.

By the way--she's Team Edward all the way.

Finally, after weeks of vampire talk, we confiscated the books and movies and told her it was time to move on to other entertainment.

(Thank goodness for horses and all horseback-riding book and movie series.)

Truly, though, her obsession with vampires made me think we'd need to hang garlic around her neck to ward off future, potentially undead, boyfriends.

Instead, we decided to decorate the kitchen with our garlic harvest. It's still within easy reach should a vampire decide to pay a house call.


For several years, I've wanted to make a garlic braid to hang in the kitchen, but somehow--it never happened. As we all know, I'm not the craftiest person. I'll Pin all kinds of adorable garden crafts, but the reality is that my projects never turn out quite as I envision them. In fact, I've been known to buy all of the components for a project--and then chicken out, fearing my disappointment when my efforts don't measure up to the original project.

I think I have Pinaphobia...the fear of craftiness failure.

But honestly, a garlic braid? That shouldn't be complicated, right?

Here's a reality check: my vampire-crazy girl just got her first French braid--at the hairdressers'. 

You see, I can't braid.

Well, I can't French braid.  And from what I read, making a garlic braid is much like French braiding--you keep adding in pieces (in this case, garlic stems) to form the braid.  

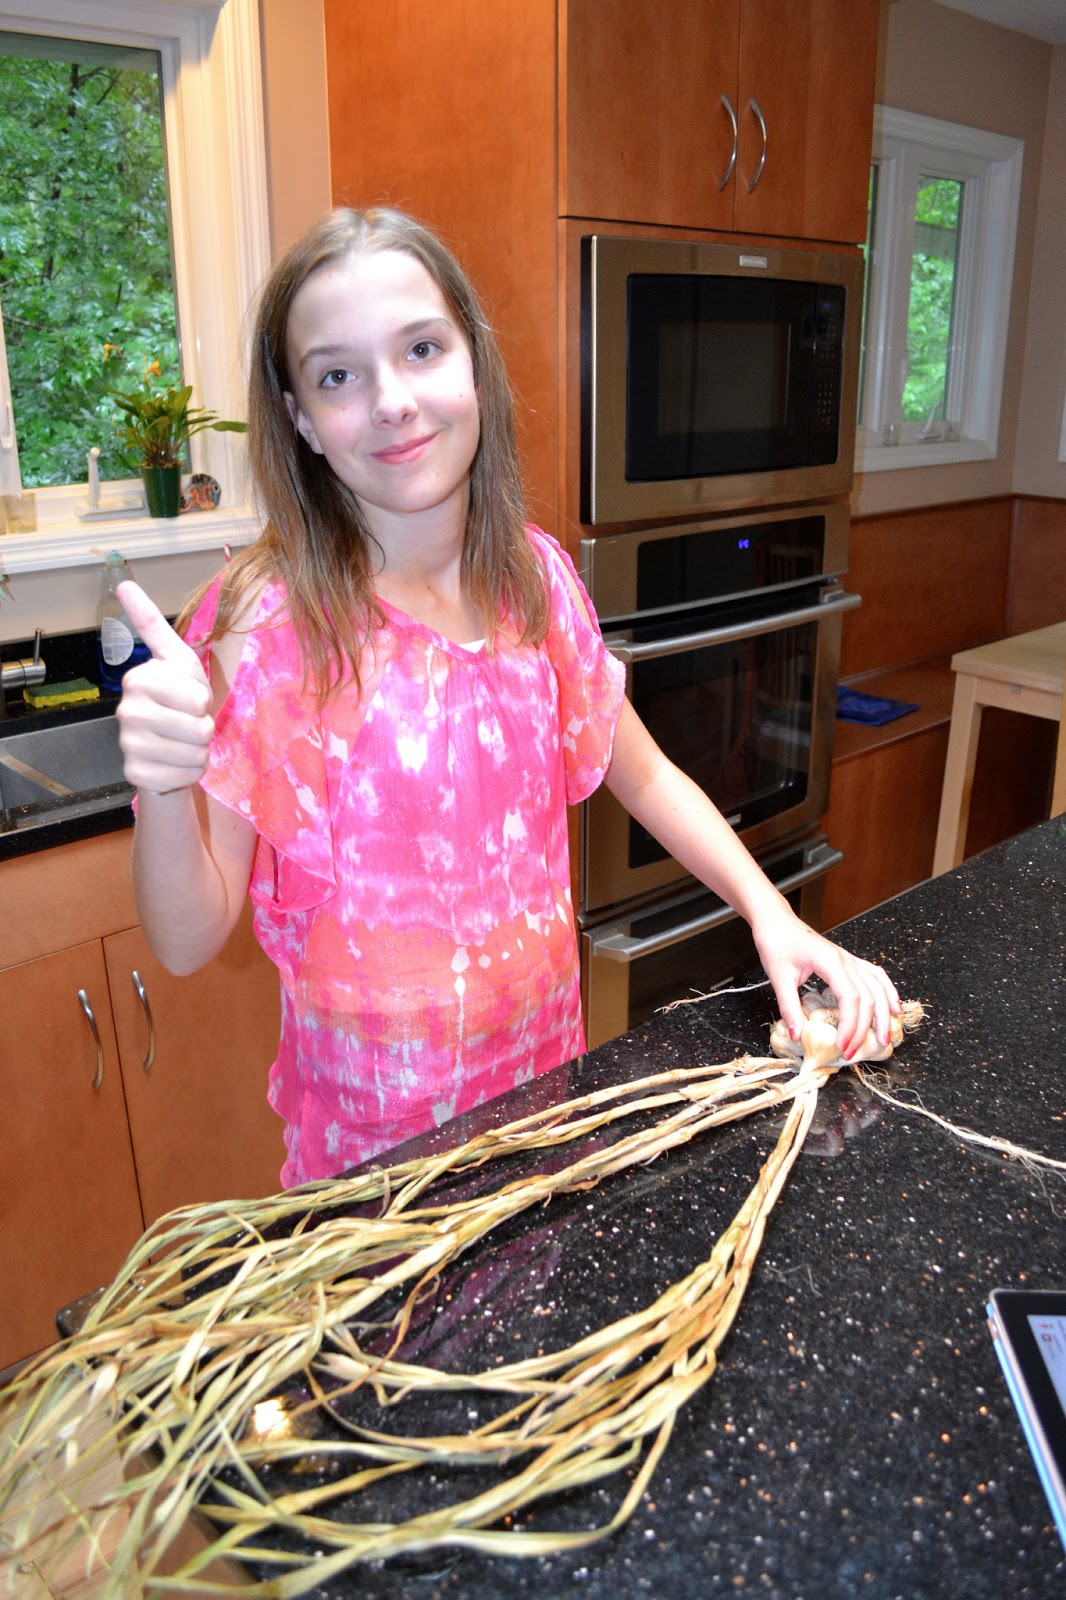
Because Kristen constantly braids horse tails and manes, the thought of braiding doesn't throw her into a panic. She volunteered to make the braid, while I played photographer.

(Perfect. A mother/daughter crafting activity that requires no crafting from this mom!)

Before the braiding begins, you first need some garlic.

Obviously.

Fortunately, two weeks ago, I harvested our garlic. It was one of those evenings when I trudged to the garden in my decent clothes, just to take a peek at the beds, and wound up harvesting garlic because it suddenly looked ready.

I know. This is why I never have any decent clothes--they're all stained and nasty from my impromptu garden forays.

After harvesting garlic from the garden, it needs to cure for about two weeks in a shady location. The racks in our garage provided the perfect garlic-curing station. Of course, my poor Prius sat in the driveway, but our garage smelled like an Italian restaurant for two weeks. Mmmm. 


Don't wash the garlic--just remove as much soil as possible. After the garlic dries, the soil will be easier to brush off the bulbs.

If you didn't plant garlic last fall, never fear--visit your local Farmers' Market and buy some beautiful softneck garlic (with the stems still attached.) I saw gorgeous varieties at my local market last Saturday.

Remove as much soil as possible from the bulbs. You can use a soft toothbrush, or you can use a brightly painted fingernail to remove the dirt and outer wrapper of the bulb. Using scissors, trim the roots of the bulbs to about 1/2 inch.


Several sites recommend soaking the leaves (which I'm referring to as stems, although softneck garlic doesn't really have "stems") of the garlic to make them more pliable. Our garlic stems were quite flexible, so we didn't bother with this step. If your garlic is extremely dry or brittle, you may want to place the stems between two wet towels until the stems soften and bend easily. 

Cut two pieces of twine, approximately two feet in length. Select three large softneck garlic bulbs and place them side-by-side, with the center bulb slightly lower. Only use softneck garlic, as hardneck garlic will not be pliable enough to braid.


Tie one piece of the twine around the stems, just above the three bulbs, forming a secure knot. (You can trim the twine later so that it doesn't show.)


Now the fun begins. Cross the right stem over the middle, then cross the left stem. The first, easy step in braiding.


Now, the fun begins. Add another bulb to the right, but place the stem in the middle. Cross the right stem over the two middle stems. The "right" stem is now in the center. Then add another bulb to the middle, again keeping the stem in the center. Cross the left stem over the middle. Now, the "left" stem is in the center. Add another bulb to the left side, stem centered, and cross the new left pieces over the additional stem.


Continue adding bulbs, always aligning the new bulb's stem with the center stems, then crossing over.


So glad my girl volunteered to help, because I can't imagine trying my hand at braiding--and juggling the camera. There's no way it would have ended well.


For the first braid, we selected 13 bulbs. As we reached lucky 13, we centered it at the top. Once all of the bulbs were braided in, Kristen continued braiding the stems, forming a nice, even six-inch braid.


Finally, using the second piece of twine, she tied off the braid, first making a knot to secure it, and then adding a bow for cuteness.


Pretty cute, don't you think?


Inspired by my daughter's braiding ability, I tried my hand at it, making a longer braid of some of the smaller garlic bulbs.

I'm just not meant for projects like this. I kept confusing myself, trying to remember which stem needed to cross where. Good grief.


Still, I didn't give up, and we now have two garlic braids hanging in the kitchen, within easy reach should Edward Cullen decide to appear.

And I've promised Kristen that I will watch many YouTube videos to learn how to French braid this summer.

It's the least I can do, because too soon she won't want me invading her space and helping with her hair.

(But if we keep lots of garlic in the house, perhaps we won't need to worry about ANY boys--undead or alive--for awhile!)

Do you have a favorite garlic recipe? Mine is shrimp scampi, which you can find here.

Happy braiding!

XOXO ~

Julie

Sunday, October 14, 2012

Holy Hot Peppers.

Today's heirloom hot pepper harvest--the last for the season.


For a family that doesn't eat a lot of spicy food, I think...perhaps...I should plant fewer hot pepper plants next year. Three gallon-sized bags of peppers went to college with Tyler and Val. One gallon is heading to a friend's home tomorrow. One small bag joined its friends in our freezer. Because we've already processed a whole lot of hot peppers, I decided it was time to end the hot pepper season in our garden. 

It's time to plant garlic, and I need a free bed.

So, ¡adiós, hot peppers. Buon giorno, beautiful garlic.

I will never complain about too much garlic.

XO ~

Julie

Friday, September 28, 2012

Goodness Grows in the Fall Garden.


I don't know why, but I'm always pleasantly surprised—amazed, even—when I plant seeds directly in the garden...

...and they actually grow.

Does this make me sound cynical? Perhaps a little. Instead, I like to think that I'm cautiously optimistic. With all of the wildlife surrounding our gardens, often I plant seeds knowing that I'm simply feeding some non-human creatures. So, I usually plant a little extra.


Two for the birds, one for the humans. Two for the mice, one for the humans.

Anyway...

Today, as I escaped the sickbay of our house and walked down to the large kitchen garden, the progress of the seedlings made my achy head feel a little better. Kristen, who has been home from school since Tuesday at noon with a tummy virus, kindly shared her germs with me.

Walking to the garden used all of my energy for the day. Plus some.


Three beds in the back garden contain fall crops, which are making decent progress. The other three beds are still producing cucumbers, peppers, and herbs, so those haven't been cleared yet. As soon as the garlic and onion sets arrive, though, the rest of the produce will be harvested, plants pulled and composted, soiled amended, and bulbs planted.

I also haven't touched the potager. It's still producing summer crops, but that, too, needs to be tackled.

But not today. I turned on the water, said hello to the chickens, and headed back inside to blearily tend my little couch potato.
 

Instead, I thought I'd share with you the fall varieties I'm growing in the first three beds. I've also set up a Pinterest Board if you'd like to see photos of each variety. All of the varieties are heirloom.


Bed 1
Brussels Sprouts ~ 'Long Island'
Cauliflower ~ 'Early Snowball'
Pac Choy ~ 'Prize Choy'
Leek ~ 'Prizetaker,' 'Blue Solaise'
Arugula


Bed 2
Swiss Chard ~ 'Silver Beet'
Cabbage ~ 'Mammoth Red,' 'Cour di Bue,' 'Early Jersey Wakefield'
Radish ~ 'Early Scarlet Globe,' 'Plum Purple,' 'French Breakfast'
Lettuce ~ 'Forellenschluss,' 'Flame,' 'Lolla Rossa,' 'Grandpa Admire's,' 'Red Romaine,'  'Rouge d'Hiver,' 'Tennis Ball,' 'Amish Deer Tongue'

Bed 3
Peas ~ 'Amish Snap,' 'Tom Thumb,' 'Golden Sweet'
Kale ~ 'Red Russian'
Carrots ~ 'Parisienne,' 'Dragon,' 'Scarlet Nantes'
Spinach ~ 'America,' 'Bloomsdale'
Lettuce ~ 'Forellenschluss (Yep, I planted this in both beds. It's my favorite.)
'Merveille des Quartre Saisons,' 'Yugoslavian Red Butter,' 'Crisp Mint'

Still to plant:
Purple Sprouting Broccoli
Romanesco Broccoli
Beets

Garlic ~ 'Purple Glazer,' 'Music,' 'Inchelium Red,' 'Lorz Italian'
French Shallots
Onions
Saffron Crocus

I also need to add the companion herbs around the perimeters of the beds to help repel cabbage worm, but that's a task for when my head recovers.

IF it recovers.

Hmmm...what am I missing? What is your favorite fall crop—and variety—to grow?
Are there any of your favorites that I should add to our gardens?

Whew. It's time to head back to the couch. Honestly, the viral visitors are welcome to leave anytime.

I think we need an exorcism. Or an extra large bottle of Lysol.

Hope you have a happy, healthy weekend!

Julie


Tuesday, November 22, 2011

Making Magic.

Last week, I picked up a novel called The Magicians by Lev Grossman, thinking that this might be a fun read for our girlie. As I found it in the teen section, however, I decided to read it first. (Confession: I love kids books, teen books, ANY books.) 

Whew. Thank goodness I checked it out! Within the first two pages, the author introduced topics including virginity (or lack thereof), masturbation, as well as some... flavorful... language.

Now, I'm not a book burner. In fact, nothing incites me more than extremist groups who try to ban Harry Potter from school libraries. But, I do worry about age appropriateness, particularly when a 10-year-old reads books with teen protagonists.

Yep. Not passing along this book to my daughter just yet.

Don't get me wrong—it's a good read so far. It's just too mature for my Kiki. Although she loves books with magic and fantasy, this one has a bit too much harsh reality that I don't want her to experience ever too soon.

Still, there is something magical about pushing the limits. As a child, I definitely read books that were too advanced for my age. And boy, do I remember the trouble we got in for passing around my friend Diane's dog-eared copy of Forever. I wasn't typically a rule breaker, but on the few occasions that I did—it was, well, thrilling.

And empowering.

Maybe even a little magical.

Breaking the rules and pushing limits is still a bit of a rush—but now, my rebelliousness lives in the garden.

(Wow, writing that aged me about 20 years, didn't it?)

I admit—I am very behind on my gardening chores this fall. In fact, I just planted our fall vegetable garden—two weeks ago. Even by South Carolina, zone 7b standards...that's late. It's almost futile.

Unless you push the limits and disobey certain rules.

Recently, I've become enamored with the concept of season extension. What can I do, with our little piece of earth, to feed my family throughout the winter? How can I keep my fall garden producing? Can I fight the elements and extend the harvest, even if the “experts” disagree? Will my garlic crop fail if I don't get it planted by Halloween? Will my lettuce wither and melt if I plant it in late October instead of mid-September? Or can I thumb my nose at conventional gardening wisdom and produce a bumper crop of brassicas to harvest in January?

The key, I think, is to break some of the rules...but still adhere to some of the tried and true methods for season extension.

There's a really terrific program with which I'm lucky enough to be associated: Greenville Organic FoodsOrganization's (GOFO) Grow Healthy Kids. Through GOFO, schools in a local district can participate in growing an edible garden, complete with lessons that match the ever important state curriculum standards. The students receive transplants and seeds, as well as organic fertilizer and supplies, from GOFO. However, the key to the success of the gardens is the highly technical row covers GOFO provides, which allows the schools to protect their crops during cold periods, so that the kids can continue to harvest crops throughout the semester.

Plastic covering + bent metal masonry ladders = mini greenhouses.

The schools can participate in both the spring and fall, with the focus on cool weather crops, since those are the veggies most easily grown during the school year in Upstate South Carolina. The low tunnels are easy to install, and the supports can remain in place throughout the growing season. When a freeze watch is issued, the teacher or students can simply place the plastic over the supports, securing the covering to the ground with rocks or bricks to keep it in place. The plastic protects the plants from damaging frost and insulates the plants from severe temperatures. On average, the temperature in the low tunnel is approximately 10 degrees warmer than the outside air. In our zone, those 10 degrees can mean the difference between an ongoing harvest—and complete crop loss.

Because I'm the Master Gardener liaison for the Grow Healthy Kids program, I decided it's time to practice what I preach.

Typically, I plant our fall garden in the potager—my experiment in an attempt to design a formal, attractive kitchen garden. Honestly, our other gardens are—to put it nicely—wild. Unkempt. In serious need of hours of weeding and prettifying. The potager is my one place that I try to keep balanced and organized. 


It's also the perfect experiment for bending the rules with season extension.

Because the potager resides in the midst of our backyard, and because our two sweet pups are fabulous destroyers of all things green, my darling husband installed a fence around the potager when we designed it.

My supports are already in place!

With no need to buy additional hardware to make low tunnel supports, I headed to the big orange box store to purchase the plastic cover. I spent a little bit more for a thicker covering. Wow--who knew how many assorted plastic drop cloths are available? For $25, I found a 4 mm, 20' x 50' plastic sheet to serve as the insulation of the low tunnel.

Honestly, the trickiest part of installing my winter covering was unrolling the plastic—if you have a friend handy, recruit the extra pair of hands. Still, in less than 15 minutes, the potager was covered, the plastic was secured to the ground on each side of the fence with several rocks, and the cool weather crops were insulated against the nighttime low of 30 degrees. 


Now, that's cold for South Carolina!

While the plastic protects against the freezing temperatures, it can also damage the garden if the temperature spikes. Immediately following our few days of freezing nights, we're back in the 70s this week. 

The beauty of the low tunnel system is its simplicity—when it's warm, roll the cover off the frame and leave it on the ground (or, in my case, on one side of the fence...)


and when the temperature drops—pull the cover back over the frame.

Presto! Fresh veggies into the winter!

It's like magic! (I hope.)

So, because I planted the fall garden so recently, I haven't harvested anything from it yet. Soon, I hope we'll have lettuce (eight heirloom varieties), spinach, chard, broccoli, pac choi, red cabbage, and cauliflower. 


But, because of the “Produce Post” hosted by smallkitchengarden.net, I thought I'd share a few things we're enjoying this week from the garden:


The fraise des bois keep surprising me. Even after several frosts, they are still producing fruit—and more flowers! Love, love these tiny delicious garden gems.

Last night, along with the quiche made from the eggs provided by our backyard chickens and enhanced with chives from the garden...


...we ate one of the last tomatoes of the season...picked green and ripened in a paper bag with a banana. Ripening green tomatoes was a huge success—our freezer is now filled with bags of tomatoes to use this winter, all picked while still green.

Our nine varieties of garlic harvested this summer continue to be a staple ingredient in almost every dish we cook. How can anyone not like garlic—especially homegrown garlic?

Probably the single most prevalent item I'll be using from the garden this week will be herbs...lots and lots of sage, parsley, rosemary, and thyme for Thanksgiving dinner. Our local, organic turkey will be dressed with many herbs. I'm still harvesting:

 Provence lavender


Italian Flat Leaf Parsley


 Pineapple Mint

 Peppermint

 Tri-Color Sage

Curly Parsley

Chives

 Greek Oregano

 Lemon Thyme

 Rosemary, possibly my favorite of all herbs.

So, while we won't be eating from the potager just yet, we might be harvesting heirloom lettuce to serve at Christmas dinner.

Homegrown lettuce in December? It's kind of...magical, don't you think?

Happy gardening!

XO ~

Julie