Wednesday, January 30, 2013

Flirting with Flowers.


Once upon a time, I fell in love. 


With flowers.


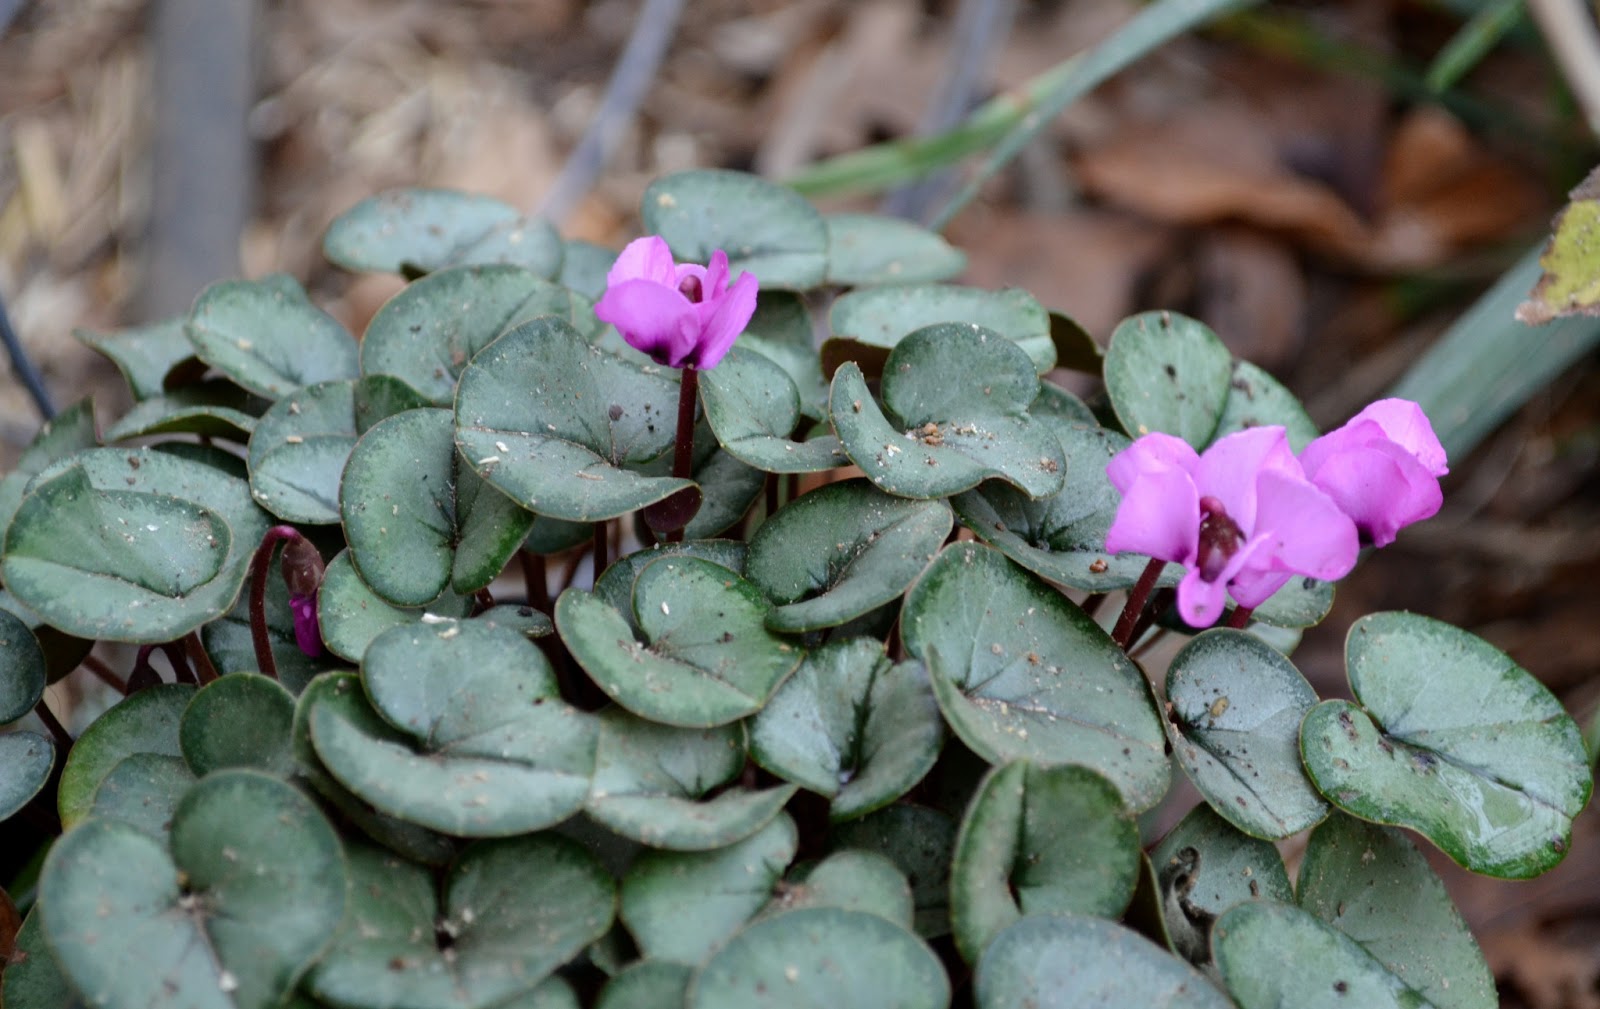
Loose, wild collections full of scent. Tight, subtle bouquets, perfectly positioned in a vase. Tiny posies, gathered and tied with a gauzy, polka dot ribbon. Tulips, long and gangly, growing and reaching for light in their vase. Handfuls of daffodils, plucked in January, to cheer a gloomy house. A single peach rose, perfect in its simplicity.


Flowers spoke to me. They said, “Don't wait for an occasion. Or a somebody. Treat yourself.”


So often, I'm consumed with edible gardening: plant the seeds for Garden Delights, weed the raised beds, switch out the cool weather crops for summer veggies, baby the transplants for the business, write about growing veggies to feed a family. Coerce the kids to eat the homegrown veggies.


And so often, I overlook what made me love gardening from the beginning:


Flowers.


I didn't grow up with a vegetable garden. My dad grew up on a farm—and when he became a successful businessman, he had no interest in returning to his roots. My mom grew up without much—and I'm sure her family probably grew most of their food out of necessity. I honestly don't know. She didn't like to talk about her childhood.


Instead, my mom loved flowers.


Tulips and daffodils.


Snapdragons and pansies.


Tea roses and lilacs.


My introduction to gardening began with beauty, not practicality. And I can assure you, with my chemist father, our garden was not organic.


Still, it was lovely. 


A little bouquet of homegrown flowers—lilacs, daffodils, tulips—always graced our kitchen table, nestled next to the permanently filled candy jar that varied with holidays. (My friends loved our bottomless candy jar.)


So, as I ordered seeds for the business, this year I ordered extra seeds—just for me.


This is the year of my cutting garden.


I harbor this secret fantasy of owning a flower farm. It's not going to happen in this lifetime. Instead, I stalk Floret Flowers and try to live vicariously through the amazingly talented Erin.


Her flowers and designs are to die for. Seriously. (I would never end a sentence with a preposition if I didn't mean it.) If you ever need an instant mood boost, just visit her site and gaze at her flowers. They're heavenly. (By the way, I don't know Erin at all. I just adore her work.)


So, while a flower farm is not in my future, I'm determined that I will have fresh bouquets all year from our garden.


We already grow flowers scattered throughout the gardens, but this year I want to be more systematic. Sometimes, I'll snip tulips from the front bed, but hate leaving empty gaps by the entranceway. So instead, I've decided to make a bed—or beds—designed just for cutting, planned with seasonal succession in mind. I've also decided to make the flowers serve double duty. By planting the flowers near the vegetable garden, we'll instantly attract pollinators.


It's my duty, right? Save the bees!


My biggest challenge is our shady yard. Oh, and voles. But I'll deal with that.


Anyway, as I'm beginning to plan the cutting garden, I thought I'd share some of the plants I plan to include, along with their projected bloom schedule. Seeds, shrubs, and bulbs all can provide beautiful cut flowers.


Along with my secret flower farm dream, I've amassed quite a collection of floral design books. I thought I'd share some of the experts' recommendations for flowers ideal for arrangements, as well as tips to increase their vase life. (I think I'll make a Pinterest Board for this so you can see the flower photos from my sources. It's a work in progress.)


Mostly, the cutting garden will comprise seeds and bulbs—a relatively small expensive for a high return. Many of the shrubs I've already incorporated into the landscape, but I'm listing them in case you want to add some flowering shrubs to your cutting garden, too.


Perfect Plants for a Cutting Garden:


Seeds


Bells of Ireland

Annual. Sow 2 to 4 weeks before average last frost. Requires light to germinate. Press lightly into soil surface and keep moist. If sowing during warm weather, refrigerate seeds one week before sowing. Bloom time: late summer. Use: Lovely green stalks with tiny white flowers are great accent stems or used as foliage. Vase life: 7 to 10 days. Dries well.


Cosmos

Annual. Sow 1-2 weeks after last frost. Full sun. Bloom time: summer. Uses: Perfect for casual summer bouquets. Vase life can be up to 10 days when cut fresh from the garden.


Delphinium

Perennial. Sow 1 to 2 weeks after average last frost. Requires darkness to germinate. Sow at recommended depth of 1/4”. Best germination at 70-80 degrees F. Blooms late spring/early summer. Full sun. Thrives in cool, moist climates. (Note: I've never had luck with delphinium—I think it's too hot in SC. But I'm going to try one more time because it's so beautiful.) Uses: Harvest when ¾ of blooms are open. Tall flowers add height to arrangements. Vase life: 5 to 7 days.


Forget-me-not

Perennial. (Also annual varieties.) Plant seeds 1 to 2 weeks before average last frost date or as soon as soil can be worked. Can sow in early fall for early spring blooms, which is helpful in warm climates. Grows best in partial shade with moist soil. Blooms spring and early summer. Use: Harvest when a few flowers are open. Flowers shouldn't shed when handled. Submerse cut flowers into deep, cool water to harden them prior to arranging. Base life: 5 to 7 days.


Foxglove

Biennial. (Foliage first year, blooms second year.) Sow seeds 1 to 2 weeks after average last frost up until two months before first fall frost. Requires light to germinate. Press seeds into moist soil, do not cover. Prefers shade/partial sun. All parts of the plant are poisonous. Blooms late spring/early summer. Uses: Harvest when bottom third of bell shaped flowers open. Vase life: 10+ days. Recut the thick stem to avoid blockage and increase vase life.


Poppy

Hardy in zones 1-6, grown as an annual in zones 7+. Sow seeds 4 to 6 weeks before average last frost or as soon as soil can be worked. In mild climates, fall sowing is recommended. Seeds require light to germinate. Poppies like cooler weather. Foliage dies back in summer heat, reappearing in fall. Bloom time: late spring. Uses: Cut in bud stage when the bud shows some color of the blossom. Vase life: 3 to 5 days. Sear the end of the poppy and place in warm water. Can also use the pods to add interest to arrangements.


Snapdragons

Annual. (Perennial usually grown as an annual. May overwinter in climates as cold as USDA zone 5.) In cold climates, sow seeds 4 to 6 weeks before average last frost or as soon as soil can be worked. Mild climates: sow seeds in late summer to early fall for winter and spring blooms. Uses: Harvest when a few buds are open along the base and others show good signs of color. Vase life: 10 days to two weeks.


Stock

Annual. Sow 2 to 4 weeks before average last frost. For blooms throughout the growing season, sow every 4 weeks. In mild winter climates, sow in fall for early spring blooms. Grow in full sun to light shade. Average bloom: early summer. Uses: Harvest when one-third to one-half of bottom blooms are open. Vase life: 3 to 5 days. Cut thick stems for better water penetration.


Sunflowers

Annual. One of the easiest, most rewarding flowers to grow in a cutting garden. Sow seeds 1/2” deep, 1 to 2 weeks after average last frost. I typically sow seeds every few weeks throughout early summer for a long harvest. Full sun. Bloom time: summer through fall. Uses: Harvest when three-fourths to fully open, center free from signs of pollination. Vase life: 5 days. If large leaves wilt, strip them to prolong vase life. Watch the water level—sunflowers are thirsty!


Sweet Pea

Annual. Delicate, fragrant beauties grow best when seeds are soaked in water for 24 hours or nicked with sandpaper prior to sowing. In mild climates, plant in late fall/early winter for spring blooms. In cold climate, sow seeds 4 to 6 weeks prior to last frost. Full sun, needs support. Plant and seeds are poisonous. Uses: Harvest when a few flowers open at the base of stem. Vase life: 3 to 5 days.


Zinnia

Annual. Sow seeds 1 to 2 weeks after average last frost. Full sun. Long lasting garden and cut flower. Thrives in hot weather. Uses: Harvest when flower is mostly open. Handle gently, as zinnias bruise easily. Vase life: 5 days.


Wow. If you're still here—congratulations! I've just realized that instead of a blog post, I'm writing an epic tome about cutting gardens. I'm sorry—I've obviously gotten carried away with my flower lust.


So, because I know you have other things to do today, I'll continue our chat about cutting gardens tomorrow, focusing on the bulbs and shrubs for floral arrangements.


Until then, inquiring minds want to know:


What is your favorite cut flower to give or receive? Do you love formal red roses, or are you more of a sunflower person? Tulips or peonies? Daisies or daffodils?


Honestly, this little arrangement, gathered at a soccer game last year by my sweet girl and delivered in an impromptu vase, will always make me smile.


Until tomorrow...


XO ~


Julie


P.S. Want to find more interesting growing ideas?

Friday, January 25, 2013

Happy National Seed Swap Day! (Plus a Giveaway!)


Have you been gazing at seed catalogs, dreaming of spring? Wait! Before you place your order, let's have a seed swap!

Did you know that Saturday, January 26, 2013 is National Seed Swap Day? Nope, neither did I until I happened to read an article today. So, while it's too late for me to organize a local, community seed swap, I thought it might be fun to host a virtual seed swap. Want to join me?

Here's how it will work:
  1. Check your seed inventory to see what you can share. Make a list and note quantities. (Please remember—if you save seeds from your garden, please only pass along heirloom seeds. Seeds collected from hybrids usually don't grow true to the parent plant.)
  2. Make a list of seeds you'd like to receive.
  3. Go to the Garden Delights Facebook page. (In case you don't know, Garden Delights is my organic heirloom plant business.) Please “Like” the page, if you haven't already, and then find today's Status about National Seed Swap Day.
  4. Post your seed availability and your wish list of seeds in the Comments section of the post. I'll cut and paste the comments into a master document titled “2013 Seed Swap,” which you can find under “Notes.” It should make it a little easier to navigate than scrolling through lots of comments to see who has/wants which seeds.
  5. Check out seed availability, then contact the person who offers the varieties you'd like. Please arrange to share addresses privately.
  6. Make certain to pack and label your seeds carefully for the recipient. Add any information that you think the grower would find helpful or interesting, like “Germinates best in cool temperatures” or “Heirloom passed down from grandfather.” The more information, the better!
  7. Please be generous when sending seeds. Remember, germination rates vary, plus older seeds may have a lower germination rate.
  8. As the seeds should fit into a normal envelope that requires one stamp (unless you're being extremely generous), I'd recommend that the sender is responsible for postage. Everyone will be sending and receiving, so the postage costs should balance out.
  9. Please send the seeds within a week of the request, or at least let the recipient know when to expect the seeds.
  10. Have fun and make new gardening friends!
Now, I've never organized an online seed swap before...but I'm excited to try it! Please be patient if I haven't covered something or if there are any problems. I'll try my best to fix any technical issues, but any seed delivery issues is between the parties who made the agreement, OK?

And—as an extra bonus—I'm going to randomly select two seed swappers to receive a collection of seeds from Baker's Creek Heirloom Seeds and Seed Savers Exchange! All you need to do to enter the drawing is to “Follow” Growing Days, if you haven't already; “Like” Garden Delights' Facebook page; and participate in the seed swap! I'll announce the winners on February 28.

Are you ready to plant your best garden ever? Then on your mark, get set...let's swap some seeds!

Happy National Seed Swap Day (Tomorrow)!

XO ~

Julie

P.S. Here's a great site with very cute seed envelope templates. You can make your own seed packets! 

P.P.S. Check out Farm Girl Blog Fest, a great assortment of homesteading, gardening, and crafting ideas.

Tuesday, January 15, 2013

Baking Baguettes.


I love to bake. While daily cooking tends to be a necessary evil for me, baking is a pleasure. It demands full attention--read a recipe, follow directions, et voilá! Deliciousness. No one complains when you bake a chocolate cake. No one makes faces when forced to eat apple pie. And no one ever complains about the smell of fresh bread lingering in the house.

With the constant rush to make something semi-healthy for dinner that everyone will eat, daily cooking is a frantic, hurry-up-and-get-it-done stress.

But baking?

Baking is intentional. Baking is relaxing.

Baking is celebratory.

But baking bread? Now, that makes me nervous.

Peter is our bread baker. He magically crafts scrumptious, braided loaves of “Sunday Bread,” as he calls it, using a recipe hand-written in Swiss German. It's a treat when he makes bread, but it's a treat that doesn't last long. We can easily polish off a loaf of bread in a few hours, especially if Tyler is home.

There's something very romantic about baking bread. I'm sure my grandparents would roll their eyes at my romanticizing bread making, since it was a daily chore for them. Still, the vision of crusty baguettes eaten warm from our oven often occupies my thoughts. Surely, it couldn't be that difficult. 

Right?

So, when my new friends at Farm Chick Chit Chat introduced a bread baking blog party, I decided it was time to embrace the art of baking bread.

The bread of choice for my experiment?

Baguettes, of course.


A year ago, I requested The King Arthur Flour Baker's Companion for a Christmas gift. It's 620 pages of intimidation. For instance, on page 239, you'll find this reassuring bit of baguette wisdom:

Let this recipe be the starting point on a journey that may last for quite a long time—the 'perfect' baguette is a serious challenge for the home baker.”

Huh.

Excuse me, I'd rather have a fool proof recipe, please—one that's going to work the first time out. Please, Mr. King Arthur, sir?

Anyway, I refused to be intimidated by a bit of flour, water, salt and yeast.

There was no turning back.

First, though, as a bread baking novice, I needed to figure out a few technical details.

Like what the heck is a poolish? Am I the only one who doesn't know what this is?

In case you, too, wondered...it's simply a type of starter that's based on equal parts (by weight) flour and water with a touch of yeast. It's used to enhance the flavor of the baguette. Then, when making the dough, the same amount of water is used with double the amount of flour. According to my guide, it's the “classic French proportions for a baguette.”

Oh lá lá! C'est manifique!

Baguettes

Ingredients
Poolish:
1-1/4 cup (5-1/4 ounces) unbleached all-purpose flour
2/3 cup (5-1/4 ounces) cool water
1/8 teaspoon instant yeast

Dough:
Generous 2-1/2 cups (10-1/2 ounces) unbleached all-purpose flour
1-1/2 teaspoons instant yeast
2 teaspoons salt
2/3 cup (5-1/4 ounces) cool water

Poolish:
  1. Combine the flour, water, and yeast in a medium mixing bowl. Mix until just blended.
  2. Let the mix rise for 12 hours or so. It should look spongy and aerated. It should be at peak flavor just before it starts to fall, so try to use it before its descent.
Dough:
  1. Place the flour, yeast, and salt in a mixing bowl.
  2. Add the poolish and water.
  3. Mix the dough until it's just cohesive, approximately 30 seconds.
  4. Cover and let dough rest for 20 minutes.
  5. Knead the dough, using a mixer or your hands, until it's elastic but not perfectly smooth. The surface should still be a bit rough. You aren't kneading it thoroughly, because as it slowly rises, the gluten continues to develop. Too much kneading equals an “unpleasantly stiff” gluten during the long rise. (Seriously. Unpleasantly stiff. It's in the book.)
  6. Transfer the dough to a lightly oiled bowl. Cover the bowl and let the dough rise for two hours, folding it over after the first hour. Folding helps strengthen the gluten. To fold the dough, lift it out of the bowl, gently deflate it, fold in half, and place back in the bowl. Folding expels the excess carbon dioxide and redistributes the yeast's food.
  7. Divide the dough into three pieces and form them into rough logs. Let them rest for 20 minutes.


  8. Shape the logs into long, thin baguettes.
  9. Proof the baguettes, covered, in the folds of a linen or cotton couche, until they are puffy—about 40 minutes. (Yes, I know...I had to look up “proofing” and “couche.” A couche is a rectangular piece of cloth that can cradle multiple rising baguettes in its folds, helping the dough retain its shape. To proof is to cover the dough, allowing it to rise. Clear acrylic proof covers are designed to cover the rising dough, but you can also use a wet towel or plastic wrap, as long as it doesn't stick to the dough and deflate it. I used a wet towel, held aloft by four glasses on either side of my parchment paper “couche.” Creative baking for the bread-tool challenged...)


  10. Preheat the oven and baking stone to 500 degrees. The stone helps create a crispier crust, but you can use a pan.
  11. Using a sharp serrated knife, make four diagonal cuts in each loaf, at a 45 degree angle.
  12. Spray the loaves with warm water to help replicate a steam oven.
  13. Place the loaves on the stone in the oven.
  14. Reduce the heat to 475 degrees and bake the loaves for 20 minutes.
  15. Remove the loaves from the oven when they are golden brown, and transfer to a wire rack to cool.
  16. Allow loaves to cool completely before cutting, otherwise the texture might be gummy, since they will contain moisture that migrates out as they cool.
As I pulled the loaves from the oven, my first thought was--

...those are some seriously homely baguettes.

In fact, I wrote off the baguette experiment as a failure.

But then, I decided that I needed to try a tiny piece.

And you know what?

It. Was. Good.

Ugly, but tasty. The crust? Crispy. The interior was flavorful, but a little too heavy.

For a first try—it wasn't too bad.

When I finally went to bed at 1 a.m., Peter—who I thought was asleep—got out of bed to try a piece, enticed by the smell lingering throughout the house.

And he liked it!

It really did smell amazing.

In fact, everyone seemed to deem my experiment a success. From the three loaves, this is what remains (less than 24 hours later—and Tyler isn't even home from college):


So, it's true. The “perfect” baguette eluded me this time, but I baked some pretty darn good bread.

I will master the Art of French Baking.

I will.

Happy baking to you!

XO ~

Julie

Counting the Days Until Spring (62!)--Garden Bloggers' Bloom Day.

It's coming. 

Only 62 more days of dank, gray, depressing nastiness.

I know I shouldn't complain. After all, we sweated on Sunday, with the temperatures hitting mid-70s.
 
And I know you northern friends are rolling your eyes at me. I remember those lovely days of -50 degree wind chill and salt-stained boots. 

If we'd just have a little burst of sunshine, I wouldn't complain. I promise. 

The grayness and the rain are just making me feel...moldy. Lethargic. Sluggish.

Still, I know spring lurks just out of reach.

Look what I found!


The first snowdrop! Isn't it the most cheerful little bloom? I adore its lack of pretension. I especially love how easily you can miss the secret little green heart hidden within. Do you see it?


Closely followed by the first snowdrop, the hellebores began their lovely display. Thank goodness for hellebores. In the midst of the oppressive grayness of January, when everything is bare, dank, muddy, and stagnant, hellebores quietly unfurl, providing the pop of color and bit of hope winter gardeners crave. 


What a work horse. 


Particularly in our shady gardens, hellebores provide lovely color, as well as year round interest with their evergreen, serrated foliage in zone 7b. 


Plus, from the five original plants I purchased approximately 10 years ago, we now have more than 100 hellebores scattered throughout our shady yard. I'm often tempted by new, stunning hybrids when I browse through some of my favorite catalogs, but these originals always remind me that newer isn't always better. (Although, after reading my friend Helen Yoest's article in Country Gardens magazine about Pine Knot Farms hellebore nursery, I'm secretly drooling over the lush fields of flowers.)

I've also seen hellebores used in many of the trendiest floral studios, like Saipua. If you need a dose of sheer, awe-inspiring beauty, check out Saipua, as well as Floret Flowers. These women produce amazing work. 

I need a flower farm. Sigh.

As I tried to get a better angle for the hellebore photos, Oreo decided she needed some love. 


She really is part dog. Truly, how many cats come when called, stand on their hind legs to be petted, and follow you to the bus stop? (Just don't tell her I called her a dog.)


My love affair with fraise des bois continues. Mid-January, and look--blooms. We'd still be eating berries if we hadn't experienced two weeks of freezing evening temperatures earlier this month. Everyone needs fraise des bois in their gardens. Yes, you do--trust me.


The daffodils are ready to pop. Is there anything more cheerful than daffodils? My mom used to buy a 10-stem bunch of daffodils from the grocery store for $1.99, just to brighten the kitchen table. When I began working, I always kept a vase of daffodils on my desk during the sad Chicago winter. Daffodils make me happy.


New to the garden last fall, the witchhazel buds are about to burst. I'm excited to see how it performs, plus I can't wait for its fragrance to grace the garden.
 

One of my favorite fragrant bushes is winter daphne. We're often warned that daphne is temperamental when planted in garden beds, so I chose to plant ours in containers near the front entrance. I'm anxiously awaiting its sweet, welcoming greeting. It's so close, I thought for certain it would be blooming in time for GBBD.

Patience. Not my strong suit.


Kristen's cherry tree continues to bloom...and bloom...and bloom. A few flowers here, a few there. It's been non-stop since autumn, but just piddly little blooms. I envisioned a cherry tree overwrought with blossoms. Lesson learned. This photo is a good example of how dreary the days are--nothing but gray.


I'm excited about a few new blooms added to the garden. Somehow, I never planted hardy cyclamen in our shady garden. What was I thinking? I definitely needed to rectify that mistake.
 

Not only do the blooms add a nice pop of winter color, but the foliage is showstopping. 


The tea olives continue to do their duty, offering a bit of fragrance from their diminutive blooms.


While I scouted for blooms along the pool, Sugar came looking for a treat. Poor girls, their run is a muddy mess after today's rain.


Our edibles continue to produce well. I thought the mushroom logs would be dormant for a bit, but we're still harvesting mushrooms regularly. I need to bump up my mushroom recipe repeteriore.
 

Ah, camellias...they never disappoint. While they've already put on their big show, a few encores remain.


On New Year's Eve Day, our family visited a local nursery, where we all received coupons toward plants and merchandise. Mikey selected a camellia, which he insists must be planted right outside his window.

I'm negotiating. If I plant it right outside his bedroom window, it will be in the middle of boxwoods and azaleas. 

Not exactly ideal. 


Of course, our gloomy days always get a reprieve with pansies and violas. Their cheerful little faces brighten January days. I've loved pansies since I was a child, except that we planted them in the spring when we lived in Indiana.

 
Our typically cheerful blooms looked tired today, drooping under the weight of rain.


The violas, though, still provide a burst of perkiness.

As I've mentioned a time or two, I'm a hopeless failure with house plants. However, I'm determined to keep alive the two lovely orchids I received for Christmas from my family. 


I will. I will!


I do manage to keep forced bulbs healthy throughout the holidays, at least. 


Paperwhites are so simple to force, and the variety I purchased had a nice, subtle fragrance--not the typical sickeningly sweet scent.  


And finally, finally...my amaryllis bulbs began blooming--yesterday! Just in time to share for Garden Bloggers' Bloom Day.

So, only 62 more days until our gardens will be filled with blooms. Until then, I'll be heading over to May Dreams Gardens to see what my garden blogger friends found blooming in their gardens.

Do you have any blooms to share?

Happy Bloom Day!

XO ~

Julie 

Friday, January 11, 2013

Kale Fail.


Our winter gardens amaze me—lush chard, spicy arugula, colorful radishes—all thanks to our simple homemade low tunnels. Granted, the lettuce is a little limp right now due to some extremely cold nights, but the rest of the garden is right on track.

And the kale is a show stopper.

Isn't it pretty?

Like most mothers, I'm constantly battling our children's taste buds. I try to feed them healthfully—we obviously grow enough organic produce to ensure their nutrition—but actually getting the food down their throats is another matter.

Admittedly, I grew up as the world's pickiest eater. As the fourth of four children—and a surprise addition--my parents never forced me to eat my peas. Or carrots. Mom and Dad were too tired to sit at the dinner table with me until 9 p.m., as they often did with my siblings (or so I've been told.)

So, although I'm determined to get the kids to eat more veggies, I'm also a realist. I look for ways to trick them into eating veggies.

Like kale chips.

Salty, oily, crunchy—it's the perfect snack alternative to Pringles.

Right?

Plus, if kids help grow the produce, they're more likely to eat it.

It's true. I've seen it.

(Just not, necessarily, with our children.)

So if you, like me, resolved on January 1 to feed your children—or yourself—more veggies, adding kale to your garden and your menu is simple.

Grow.
Kale is a cool season crop whose flavor improves when exposed to frost. It's a hardy biennial, meaning that it takes two years to flower and complete its life-cycle. Most of us, though, grow kale as an annual. In our zone 7b garden, it thrives throughout the winter.

Kale prefers loamy, well-drained, moist (but not soggy) soil of average fertility, with a pH of 5.5 to 6.8.

Plant kale in early spring, four weeks before the last frost, in full sun. You can also plant kale in partial shade in hot climates. In mild climates, kale can be grown year-round. I planted ours in October.

Space plants six inches apart. Side dress throughout growing season with organic liquid fertilizer, such as fish emulsion. Keep kale evenly watered.

Kale flourishes with companion plants such as beets, celery, herbs, onions and potatoes, but it does not enjoy beans, strawberries or tomatoes. Aromatic plants, like chamomile, mint, oregano, rosemary, sage, thyme, and wormwood, repel cabbage fly and cabbage worm. (Note: mint can be invasive and take over your garden! Plant in pots near the kale to help prevent unruliness and keep pests away.)

If you'd rather grow kale from seed, start the seeds five to seven weeks before the last expected frost. If you’re direct sowing, plant the seeds outside two to four weeks before the last frost in spring or anytime at least 10 weeks before the first frost in fall. Whichever season you choose, the soil temperature must be at least 40 degrees or higher for good germination. Kale germinates best in soil that is approximately 70 degrees.

Harvest.
Begin harvesting kale approximately eight weeks after sowing. Small, tender leaves are great for salads. For cooking, harvest six-inch outer leaves, leaving the center leaves to continue growing.

Hot weather produces bitter, tough kale. You don't want to use this fresh--instead, you can add it to dishes and soups, cut into small pieces. 


Eat.
Kale can be braised, sautéed, or eaten raw. It's also delicious in soups. I may try kale potato soup next. I think I saw a recipe in one of my Alice Waters cookbooks. Hmmm.

Kale chips are extremely easy to prepare. The most time-consuming task is washing and drying the kale.

Kale Chips
Ingredients:
10 large kale leaves, washed and completely dried.
Extra Virgin Olive Oil
Sea salt
  1. Preheat oven to 300 degrees.
  2. Wash kale leaves, drying completely. I used both a salad spinner and paper towels to dry the kale. Make certain that the kale is thoroughly dry, because any remaining moisture will produce steam in the oven, resulting in limp kale chips.
  3. Tear kale into bite-size pieces. Remove the tough stem.
  4. Place kale in single layer on a baking sheet.
  5. Drizzle extra virgin olive oil over the kale. Massage the oil into the kale with your fingers to thoroughly coat the leaves.
  6. Sprinkle sea salt over kale. You can experiment with other spices, like garlic salt, cumin, or red pepper flakes, but I needed to keep it basic for my kiddos' palates.
  7. Place in oven and bake for 15 minutes or until crispy.
  8. Cool and serve.

The crispy, curly edges of the kale literally melted in my mouth.

While I liked the kale chips, the big test awaited the arrival of the school bus.


(I didn't get a photo of Mikey trying his kale chip. This was his reaction when I asked him to try it one more time.)

Kale fail.

Honestly, what am I going to do with these children?

Ideas? Suggestions?

Do you--or your kids--eat kale chips? Do you force feed your loved ones veggies, or do you hide them in things like chocolate brownies? 

Please...do share.

Back to the drawing board...and garden. There must be something besides cucumbers and corn that these kids will eat.

Happy Friday!

XO ~

Julie, the highly frustrated organic veggie grower